Table of Contents
- Pattern and Layout Ideas for Your Custom Paver Patio Design
- Choosing the Best Paver Materials for Your Climate
- Paver Patio Drainage Solutions That Prevent Costly Repairs
- How to Add Lighting to Paver Driveways and Patios
- Outdoor Kitchen Paver Design and Vertical Elements
- Color, Accent Borders, and Natural Landscaping
- Budget-Friendly Paver Solutions and Installation Choices
- Frequently Asked Questions
Last Updated: September 18, 2026
Pattern and Layout Ideas for Your Custom Paver Patio Design
Great custom paver patio design ideas start with pattern. The layout you choose sets the tone for everything else, from how big the space feels to how well it hides wear over time.
At Venice Pavers, we’ve installed hardscapes for more than 30 years, and the pattern question comes up in nearly every consultation. Here’s the short version: herringbone handles traffic best, basketweave looks best in small squares, and running bond is the easiest to live with.
Herringbone, Basketweave, and Running Bond Patterns
Herringbone is a zigzag layout where rectangular pavers sit at 90-degree angles to each other. It locks pavers together tightly, so it resists shifting better than almost any other pattern. Driveways and walkways are its natural home.
Basketweave pairs pavers side by side in alternating horizontal and vertical blocks. It reads like a woven basket, which makes it a strong pick for patios and entryways where you want texture without busyness.
Running bond is the classic brick-style stagger. It’s simple, fast to install, and easy to repair because individual pavers lift out cleanly.
| Pattern | Best For | Traffic Strength | Repair Ease |
|---|---|---|---|
| Herringbone | Driveways, walkways | Highest | Moderate |
| Basketweave | Patios, entries | Good | Moderate |
| Running bond | Large open patios | Good | Easiest |
Creating Defined Zones with Geometric Layouts
A single paver field makes one big room. A geometric layout makes several.
Use bands of contrasting pavers to separate a dining area from a fire pit area. Change the pattern direction at the boundary. Add a circular accent where a walkway meets the patio.
These moves cost little and do more for an outdoor living space than almost any furniture choice.
Choosing the Best Paver Materials for Your Climate
Material choice is where most guides go soft. They list four options and move on. The deciding factors in a hot, humid, salt-air climate are different from what matters in a freeze-thaw region, and picking the wrong paver for your conditions is the fastest way to a patio that looks tired in three years.
How Each Material Performs Under Heat, Rain, and Salt
Concrete pavers are the workhorse. They’re manufactured to a compressive strength standard (look for ASTM C936 compliance), come in dozens of colors and finishes, and pair well with polymeric sand joints. In extreme heat they can fade slightly over many years, but modern integral pigments hold up well. They’re also the easiest material to match later if you need to replace a section.
Natural stone like flagstone and travertine brings one-of-a-kind color variation.
A Simple Decision Framework
| Your Priority | Best Material | Why |
|---|---|---|
| Lowest upfront cost | Concrete pavers | Widest availability, simplest install |
| Coolest underfoot | Travertine or light-colored concrete | Reflects heat, low thermal mass |
| Salt-air and stain resistance | Porcelain | Near-zero absorption, colorfast |
| Easiest future repair | Concrete pavers | Consistent sizing, easy to match |
Matching Material to Climate Zone
In hot, humid, salt-air conditions, prioritize low water absorption and colorfastness, porcelain and quality concrete pavers lead here.
For coastal properties, ask about salt-air resistance before you fall in love with a color. Some finishes chalk or fade faster near the water, and the difference shows up within a few seasons.
The Question Most Homeowners Forget to Ask
Ask your installer what happens when a paver cracks or a section settles. Materials that are locally stocked and consistently sized are far easier to repair five years from now. A beautiful imported stone that can’t be reordered in the same dye lot becomes a patchwork the first time something goes wrong.
Paver Patio Drainage Solutions That Prevent Costly Repairs
Water is the number one killer of paver patios. Not traffic. Not sun. Water.
Good paver patio drainage solutions start below the surface:
- Slope the finished patio away from the house at a steady grade
- Build a compacted, properly sized sub-base
- Add a drainage bed or channel where water collects
- Use polymeric sand to lock joints against washout
- Tie into existing yard drainage where possible
How to Add Lighting to Paver Driveways and Patios
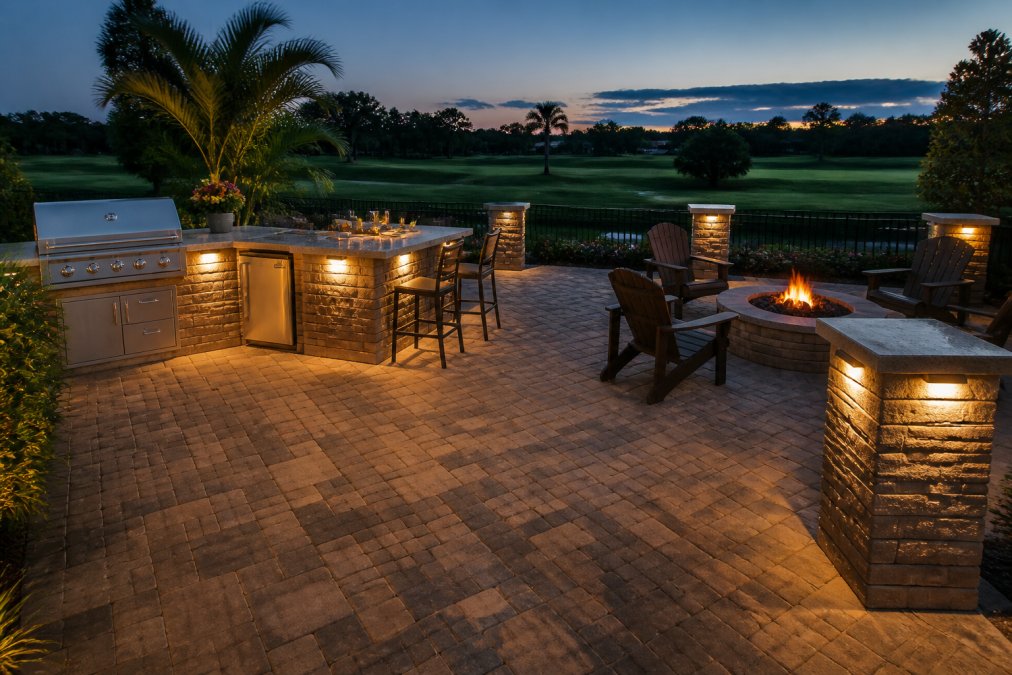
Learning how to add lighting to paver driveways pays off twice: it looks better at night, and it makes the space safer to walk.
Three approaches work well:
- Paver lights set into the surface, flush with the walking area
- Step and wall lights for elevation changes and seat walls
- Low-voltage path lights along borders and planting beds
Skipping lighting during installation usually means paying for a second crew later. Plan the conduit runs while the base is open, even if you install fixtures in a later phase.
Outdoor Kitchen Paver Design and Vertical Elements
Flat patios are forgettable. Vertical elements are what people remember.
Color, Accent Borders, and Natural Landscaping
Color sets the mood before anyone steps onto the patio. Warm tans and terracottas feel inviting. Grays and charcoals feel modern.
Budget-Friendly Paver Solutions and Installation Choices
You can control cost without settling for a patio that fails in three years. The problem is that most guides tell you to “choose affordable materials” and stop there. Here’s what actually moves the number.
What Drives Paver Patio Cost
Four factors set your total, roughly in order of impact:
- Square footage, the single biggest lever. Cost scales almost linearly with area.
- Material, concrete pavers sit at the low end; porcelain and natural stone at the high end, often two to three times the material cost.
- Site access and grading, a flat, open backyard is cheap to work in. Tight side yards, slopes, and demolition of an existing surface add labor fast.
- Complexity, curves, circles, and multiple pattern changes mean more cuts and more waste.
Where to Save Without Regretting It
- Choose concrete pavers over porcelain or natural stone. You keep durability and gain color options.
- Keep the layout simple. Straight runs and a single pattern cut labor and waste dramatically.
- Phase the project. Patio first, then kitchen, lighting, and planters in later seasons.
- Reuse excavated material for grading and berms where it fits the plan.
- Skip the accent border if budget is tight, it’s a nice-to-have, not a structural need.
DIY vs. Professional Installation: An Honest Breakdown
This is where the real money decision lives.
DIY makes sense when:
- The project is small (a walkway, a small landing, a single seating pad)
- The ground is flat and drains well already
- You can rent a plate compactor and have time to do base prep correctly
- You’re comfortable with excavation, grading, and edge restraint
Professional installation makes sense when:
- The patio is large or irregularly shaped
- There’s any slope, drainage issue, or existing surface to remove
- You want a warranty on the base and the finished surface
- The project includes walls, pillars, an outdoor kitchen, or integrated lighting
The reason is simple: base prep is where patios live or die, and it’s the part DIYers most often under-build. A perfectly laid surface over a bad base will sink, shift, and pool water within a couple of seasons, and fixing it costs more than hiring a pro would have.
A DIY paver patio that fails on base prep usually has to be torn out and rebuilt, not patched. Budget for the base like it’s the whole project, because functionally, it is.
The Bottom Line on Budget
Spend your money on what you can’t see. A modest concrete paver patio over a properly compacted, well-drained base will outlast a premium stone patio over a rushed one every time. Pick the material you can afford, then refuse to cut corners on the part that holds it up.
The pattern, color, and material get all the attention. The base and drainage decide whether you’re still happy with the patio in ten years.
Frequently Asked Questions
What are the most durable paver materials for high-humidity environments?
Concrete pavers, natural stone like travertine, and porcelain tiles hold up best in humid climates. Porcelain absorbs almost no water, which helps prevent mold. Concrete pavers with a low water absorption rate also perform well. The key is proper installation with a compacted sub-base and polymeric sand in the joints to lock everything together and block moisture from settling underneath.
How do you incorporate drainage into custom paver patio designs?
Drainage planning starts before any paver goes down. A slight slope away from your home, typically 1 to 2 percent, moves water off the surface. Below the pavers, a compacted sub-base and open-graded gravel layer let water filter through. Permeable pavers take this further by letting water pass directly into the ground. For patios near structures, a channel drain or French drain handles heavy runoff. Getting the grading right during installation prevents sinking and pooling later.
Is it cheaper to do a paver patio or concrete?
Concrete usually costs less upfront. However, concrete cracks over time, especially in areas with shifting soil or heavy rain, and repairs are visible and expensive. Pavers cost more initially but individual units can be lifted and reset if they shift. With a properly prepared base and polymeric joint sand, a paver patio can last decades without major repairs. The long-term value often favors pavers when you factor in replacement and repair costs.
What design features add the most value to a backyard patio?
Defined outdoor living zones add the most value. A fire pit area, outdoor kitchen, and dedicated seating sections make the patio usable for more of the year. Accent borders in a contrasting color frame the space and add visual polish. Built-in lighting extends evening use and improves safety. Permeable pavers and proper drainage protect the investment by preventing water damage. These features increase curb appeal and make the patio a true extension of your home.
A paver patio only looks as good as the prep underneath it, and that’s the part you can’t see once the job is done. Venice Pavers has spent over 30 years getting that part right, from drainage planning to a lifetime workmanship guarantee on our installations. As a certified Tremron installer and licensed contractor, we handle everything from a single walkway to a full outdoor living build. Get started with Venice Pavers and a free consultation to see what your yard can become.