Table of Contents
- What You’ll Need Before You Start
- Why Pavers Sink: The Real Causes
- Paver Base Preparation Guide: Depth, Material, and Excavation
- How to Compact Paver Base for Maximum Stability
- The Importance of Edge Restraints for Pavers
- Paver Drainage Solutions That Prevent Sinking
- Common Mistakes to Avoid
- Frequently Asked Questions
Last Updated: September 23, 2026
What You’ll Need Before You Start
Sinking pavers are almost never the paver’s fault, they are a base problem. Learning how to prevent paver sinking comes down to four things: the right excavation depth, the right base material, proper compaction, and water that has somewhere to go.
Before you dig, gather these:
- A digging bar, shovel, and wheelbarrow
- Crushed stone base material
- A plate compactor (rental is usually fine)
- Steel or plastic edge restraints with spikes
- Joint sand or polymeric sand
- A screed board and a long level
- String line and stakes for grading
Why Pavers Sink: The Real Causes
Pavers sink because the layer beneath them moves. Two forces do most of the damage: soil that was never compacted properly, and water that never drains away. Fix those two and most sinking problems disappear.
Poor Compaction and Soil Migration
Soil migration is the slow movement of fine soil particles into the voids of the base aggregate. When the subgrade is not compacted in lifts, those fines work up into the crushed stone, the base loses volume, and the pavers above it drop. A common mistake is compacting one thick layer instead of several thin ones, thin lifts compact far better.
Drainage Problems and Water Retention
Water is the other half of the story. When surface runoff has nowhere to go, it pools under the pavers and softens the subgrade, which can no longer carry the load, so the surface settles.
- Puddles that sit for hours after rain
- Sand washing out of the joints
- A low spot that keeps getting lower
- Pavers that rock when you step on them
Paver Base Preparation Guide: Depth, Material, and Excavation
Good base prep is a numbers game. Get the excavation depth and material right, and the rest of the install gets much easier.
How Deep Should the Base Be?
For a residential driveway, a common approach is roughly 4 to 6 inches of compacted base under the bedding layer, with deeper lifts for heavier loads; walkways and patios often need less. The softer your subgrade and the heavier your traffic, the deeper the base. Excavation depth should account for the pavers, bedding sand, and compacted base together, so the finished surface sits at the height you planned.
Choosing the Right Base Material
Crushed stone with sharp, angular edges locks together under compaction far better than rounded gravel. A common blend mixes stone sizes so smaller pieces fill the gaps between larger ones, that interlock gives the base its load-bearing capacity. Avoid rounded river rock and material with too many fines; both shift under load instead of locking.
|
Base Layer |
Typical Thickness |
Purpose |
|---|---|---|
|
Compacted subgrade |
Varies by soil |
Stable foundation |
|
Crushed stone base |
4-6 in (driveways) |
Load support |
|
Bedding sand |
1 in |
Leveling and screeding |
|
Pavers |
Varies |
Finished surface |
How to Compact Paver Base for Maximum Stability
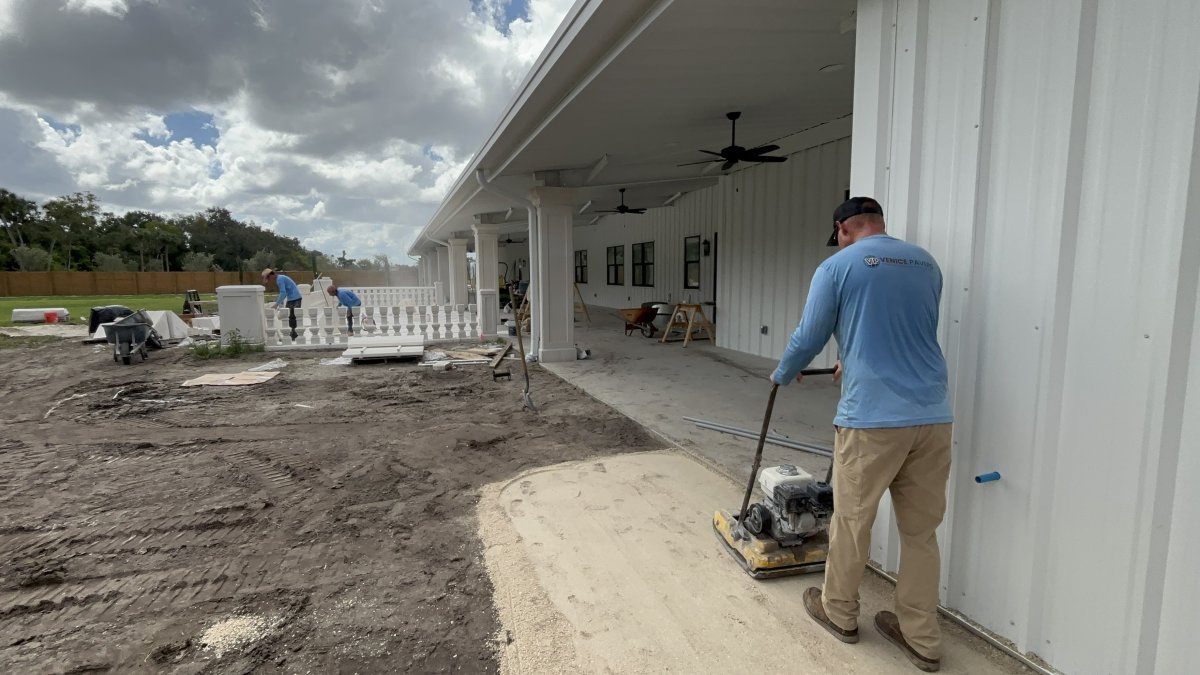
Compaction is where most DIY installs fall short. The goal is to remove air voids so the aggregate locks into a dense, stable mass. To compact paver base correctly: thin lifts, multiple passes, and a plate compactor.
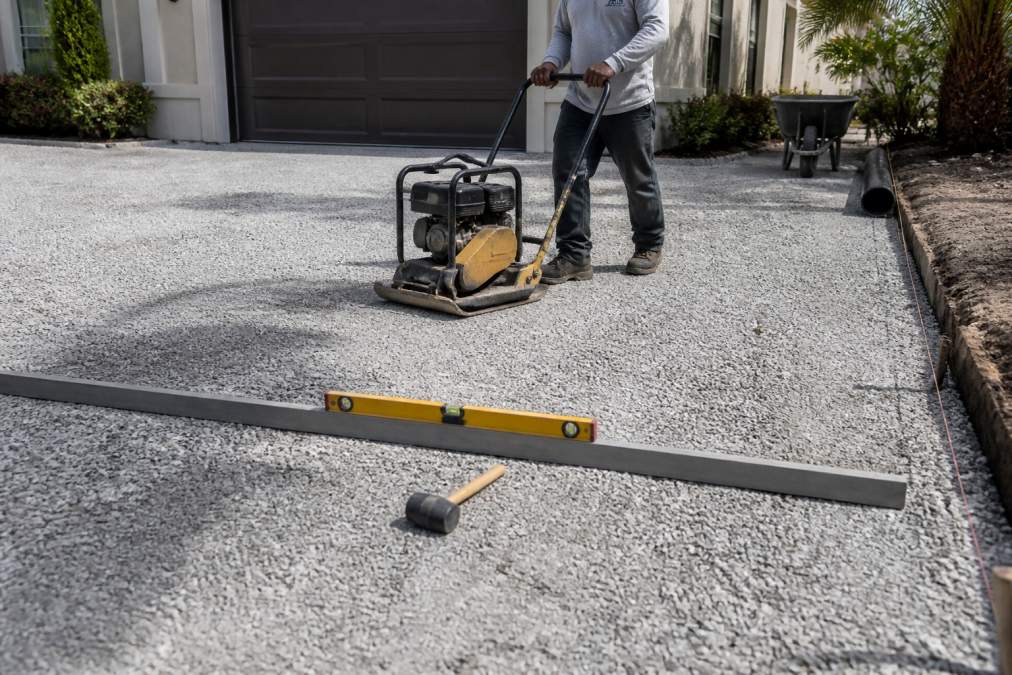
Follow these steps:
- Spread the crushed stone in lifts no more than 2 to 3 inches deep
- Compact each lift with overlapping passes
- Water lightly if the material is dusty, then compact again
- Repeat until you reach your finished base depth
- Check for low spots with a long level and add material as needed
- Screed the bedding layer to a consistent 1 inch
Compaction Equipment: What to Rent or Buy
A plate compactor is the right tool for paver base. Most homeowners rent one, since the job is short. Look for a machine with enough weight to actually move the stone, not a light tamper.
Rental tips:
Free consultation & estimate →
- Reserve the compactor for the day you spread the base
- Ask for a plate sized to your job, not the smallest unit
- Get the water tank attachment if your material is dusty
- Plan lifts so you are not compacting in the rain
The Importance of Edge Restraints for Pavers
Edge restraints are the only thing stopping the outer course of pavers from creeping outward. Once that outer course moves, the joints behind it open, joint sand washes out, and the whole field unravels from the perimeter in. The importance of edge restraints for pavers is easy to underestimate until a driveway edge fans out and the repair means pulling up the border and re-laying it.
Restraint Types and Where Each Belongs
|
Restraint Type |
Best For |
How It Anchors |
|---|---|---|
|
Concrete curb (poured or precast) |
Driveways, commercial aprons, heavy vehicle loads |
Poured against the base or set on a concrete footing |
|
Steel edge (L-shaped or flat) |
Driveways, tight radius curves, high-load edges |
Spiked through the flange into the compacted base |
|
Plastic edge (rigid PVC or composite) |
Walkways, patios, garden borders |
Spiked through pre-drilled holes into the base |
|
Aluminum edge |
Patios, pool decks, decorative borders |
Spiked or screwed into a base or sub-slab |
For anything a vehicle will drive on, a plastic edge alone is usually not enough. Concrete or steel is the safer call because it resists the horizontal thrust that tires generate.
Installation Details That Actually Matter
- Set the restraint tight against the paver field. Any gap lets the pavers rock into it.
- Anchor into the compacted base, not the bedding sand. A spike in loose sand does nothing.
- Space spikes per the manufacturer’s spec, typically every 8 to 12 inches on straight runs and closer on curves.
- Run the restraint the full length of every exposed edge, including the ends where a driveway meets a garage apron or a walkway meets a step.
- Backfill behind the restraint with compacted material so it cannot push outward.
How Restraints Tie Into Sinking Prevention
Edge restraints do not stop vertical settling on their own, but they stop the horizontal movement that accelerates it. When the perimeter holds, joint sand stays put, the interlock stays tight, and water sheds off the surface instead of running into open joints. That is why restraint installation belongs with base compaction and drainage, all three work together to keep the surface flat.
Paver Drainage Solutions That Prevent Sinking
Water control is the difference between a surface that lasts and one that keeps settling. Good paver drainage solutions move water away from the base instead of letting it sit underneath, shedding surface runoff and keeping the subgrade dry, saturated subgrade loses bearing capacity and the pavers above it drop.
Surface Water: Slope, Crown, and Channels
- Slope the finished surface away from the building at a gentle grade, a common target is about 1 to 2 percent, which is roughly 1/8 to 1/4 inch per foot.
- Crown the base slightly so the center is a touch higher than the edges. Water then sheds to the perimeter instead of pooling in the middle.
- Add a drainage channel or trench drain at the low edge of a driveway or patio where water naturally collects.
- Use permeable pavers or open-graded joints in low-traffic areas to let surface water infiltrate instead of running off.
Subsurface Water: French Drains and Swales
This is the piece most articles skip. A French drain is a gravel-filled trench with a perforated pipe at the bottom that collects subsurface water and carries it to a discharge point. A swale is a shallow, vegetated depression that moves surface water along a controlled path. Both belong in the design stage, not after the first puddle.
- A French drain along the uphill side of a patio intercepts groundwater before it reaches the base.
- A swale at the low edge of a yard gives runoff somewhere to go other than under the pavers.
- Both need a discharge point, a storm drain, a dry well, or a daylighted outlet, or they just move the problem.
Downspouts and Roof Runoff
- Direct downspouts away from the hardscape, ideally onto a splash block or into a buried drain line.
- Never let a downspout discharge directly onto a driveway or patio. The volume of a single storm can overwhelm the base in one season.
- If the roof drains toward the hardscape, plan a gutter and leader system that carries water past it.
A Simple Drainage Checklist
- Does the finished surface slope away from the building at 1 to 2 percent?
- Is the base crowned so water does not pool in the center?
- Is there a channel, French drain, or swale at every low edge?
- Do downspouts discharge away from the hardscape?
- Does every drainage feature have a real discharge point?
Get those six right and the base stays dry, the subgrade keeps its bearing capacity, and the pavers stay where you put them.
Common Mistakes to Avoid
Most sinking problems come from a short list of avoidable errors:
- Compacting one thick layer instead of thin lifts
- Using rounded gravel instead of angular crushed stone
- Skipping edge restraints on exposed edges
- Ignoring grading and letting water pool
- Rushing the bedding layer and screeding it unevenly
- Installing over soft, wet subgrade
Frequently Asked Questions
How do you fix sinking pavers?
Fixing sunken pavers involves removing the affected pavers, adding or re-leveling the base material, and compacting it properly. Then, re-lay the pavers, add joint sand, and compact again. For large areas or if the sinking is due to poor drainage, it’s best to consult a professional. They can assess the root cause and ensure the repair lasts, rather than just addressing the symptom.
What causes pavers to sink over time?
Pavers sink primarily due to inadequate base preparation, poor compaction, and drainage issues. When the base isn’t compacted correctly or water isn’t diverted away, the soil beneath can shift, causing the pavers to settle unevenly. Other factors include soil migration, lack of edge restraints, and heavy loads. Proper installation with a deep, well-compacted base and good drainage is key to preventing this.
How deep should the base be for a paver patio?
For a paver patio, the base depth typically ranges from 4 to 6 inches of compacted crushed stone, but it can be deeper depending on soil conditions and expected loads. Always excavate at least 6 to 8 inches deep to accommodate the base, bedding layer, and pavers. A professional can determine the right depth for your site.
Does poor drainage cause pavers to sink?
Yes, poor drainage is a major cause of paver sinking. When water pools around or under pavers, it can erode the base material and cause the soil to shift, leading to uneven settling. Proper drainage solutions, such as grading the base away from the house, installing a French drain, or using permeable pavers, help direct water away and keep the base stable. Addressing drainage during installation is critical.