Table of Contents
- What It Means to Grade Land Correctly
- Signs Your Yard Needs Regrading
- How to Calculate Yard Slope for Drainage
- Step-by-Step Land Grading Process
- Yard Drainage Solutions After Grading
- How to Prevent Sinking Pavers on Graded Ground
- Permits, Soil Compaction, and Climate Considerations
- DIY vs. Hiring a Professional Land Grader
- Frequently Asked Questions
Last Updated: October 4, 2026
What It Means to Grade Land Correctly
To grade land correctly means reshaping the soil surface so water flows away from your home instead of pooling against it. At Venice Pavers, grading is the foundation of every hardscape project. Get it wrong, and everything above it fails.
The goal is a steady slope that moves surface water toward a safe exit point.
Grading is not the same as leveling. A level yard holds water. A graded yard sheds it.
Signs Your Yard Needs Regrading
Watch for water where it should not be. Puddles lingering a day or more after rain are the clearest signal, along with damp spots near the foundation, soggy turf, and soil settled into a low pocket.
Other warning signs:
- Cracks in driveways, walkways, or patio slabs
- Water stains or dampness in a basement or crawl space
- Mulch and soil washing away after storms
- Gutters that dump water right at the base of the wall
If you spot several, the slope has likely flattened or reversed. Regrading restores the pitch and sends water away from the house.
How to Calculate Yard Slope for Drainage
Slope is the drop in height over a set distance, measured as a ratio or percentage. A 2% slope falls 2 feet per 100 feet of run.
For most yards, aim for a slope between 2% and 5% away from the foundation. Flatter and water stalls; steeper and you risk erosion.
Here is the simple math:
- Pick two points: one at the foundation, one 10 feet out
- Measure the height difference between them
- Divide the drop by the distance, then multiply by 100
A 6-inch drop over 10 feet is 0.5 feet divided by 10, which equals 5%. That is a healthy, working slope.
Tools for Measuring Slope and Elevation
You do not need expensive gear to check your pitch:
- Laser level: projects a beam across the yard for accurate height readings
- Transit level: a tripod-mounted scope for measuring elevation over long distances
- String and line level: a low-cost option for short runs
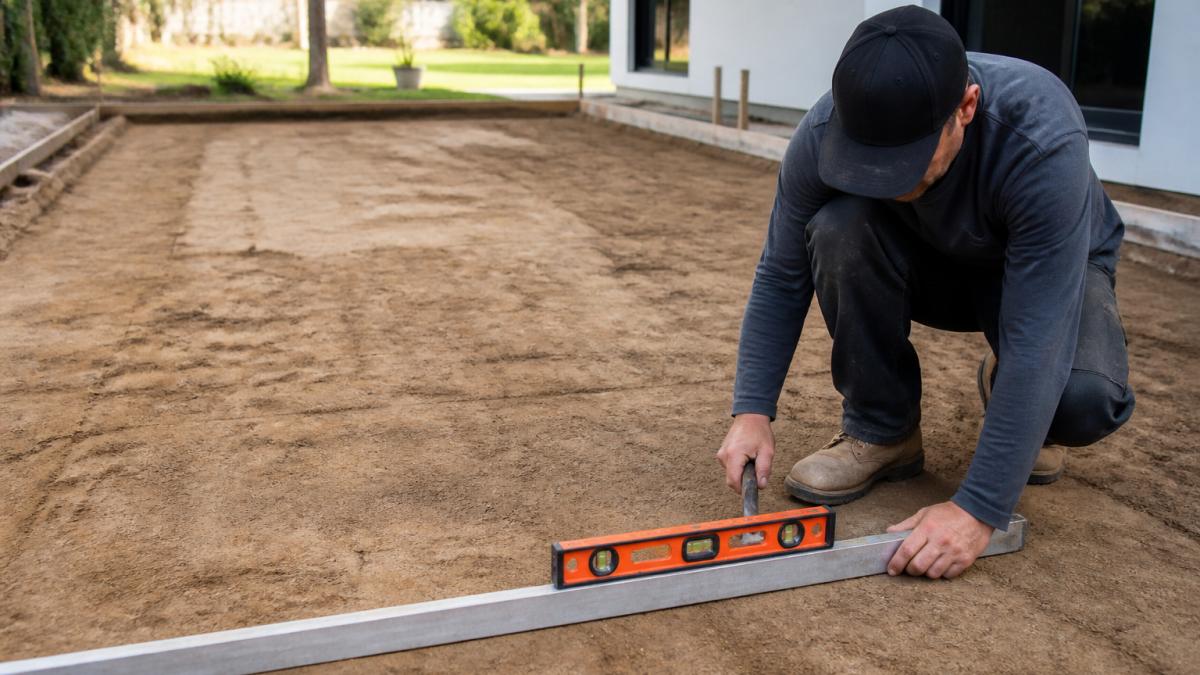
- Grading rake: helps you shape and check the surface as you work
For a quick check, drive two stakes 10 feet apart, run a string between them, hang a line level on it, and measure down to the ground at each stake. The difference is your drop.
Step-by-Step Land Grading Process
Here is how we approach a grading job. The order matters, skipping a step usually shows up later as settling or poor drainage.
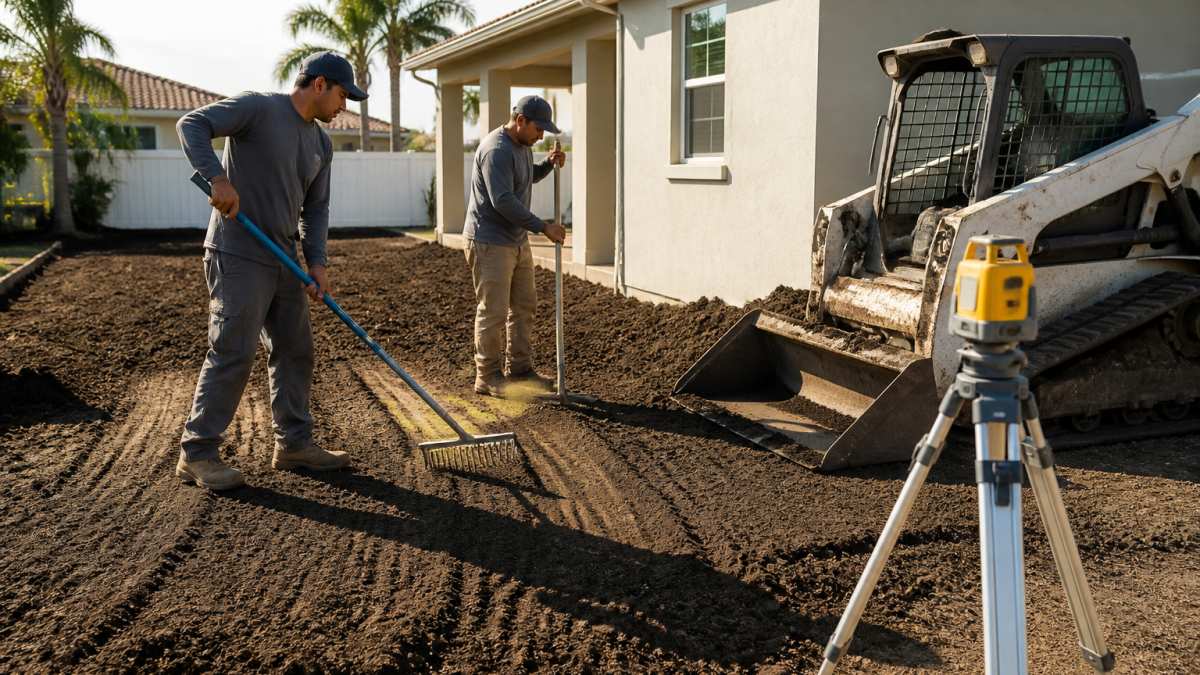
Step 1: Site Preparation and Marking
Clear the work area first. Remove sod, rocks, and debris. Mark utility lines before you dig, and call 811 so crews can flag buried lines for free.
Next, stake out the high and low spots and mark your target slope with string lines as a visual guide for the whole job.
Step 2: Excavation, Backfill, and Compaction
Cut high spots down and move that soil to low areas. This earthwork stage sets the shape of the yard.
Add fill dirt where needed, then compact it in thin lifts of 4 to 6 inches, they compact better than one deep dump. A plate compactor or skid steer with a roller does the work, and proper compaction stops the soil from settling later.
Step 3: Final Grading and Topdressing
Once the base is set, fine-tune the surface with a grading rake, recheck your slope with the laser or transit level, then spread topsoil or topdressing for a healthy planting bed.
Keep the finished pitch consistent. Small dips and humps create the puddles you were trying to fix.
Yard Drainage Solutions After Grading
Grading handles surface water, but it has limits. Once the slope is correct, the next question is where the water goes and whether that path can handle the volume. Here is the decision logic.
Start With the Exit Point
Before choosing any solution, identify where water is legally and physically allowed to leave your property, a street curb, storm drain, drainage easement, natural low area, or dry well. Without a clear exit, no amount of trenching solves the problem, and you may need a professional drainage plan or permit.
Matching the Solution to the Problem
Swales are shallow, vegetated channels that carry surface runoff.
French drains are gravel-filled trenches with a perforated pipe that move water underground.
Dry wells are buried chambers that store water and let it soak into the soil.
Downspout extensions and splash blocks are the cheapest, most overlooked fix.
Free consultation & estimate →
Retaining walls hold back soil on steep sites and manage water behind them.
How the Solutions Work Together
Most yards need a combination rather than a single fix: a swale to move surface water to the low corner, a catch basin at the driveway to intercept hardscape runoff, a French drain for the persistent wet spot near the foundation, and downspout extensions to keep roof water out of all of it.
The order of operations matters: fix the grade first, then add drainage. Installing a French drain in a yard that still slopes toward the house just gives the water a faster route to the foundation.
Maintenance Is Part of the Design
Every drainage feature needs upkeep. Swales need vegetation kept low and debris-free. French drains need their outlet checked and filter fabric or gravel kept clear. Catch basins need grates and sediment traps cleaned. Dry wells eventually silt in. An unmaintained system stops working quietly, and water returns to the foundation before anyone notices.
How to Prevent Sinking Pavers on Graded Ground
Sinking pavers almost always trace back to a weak base. When the ground under a patio or driveway was not graded and compacted correctly, the soil shifts and the surface drops.
- Excavate deep enough for a proper base layer
- Compact the subgrade before adding base material
- Use the right base depth for the load, thicker for driveways than walkways
- Plan drainage so water never sits under the pavers
- Compact the base in thin lifts, not one thick layer
Water is the enemy. Trapped moisture softens the base, and heavy loads push pavers down. Good grading and drainage keep the base firm for years.
Permits, Soil Compaction, and Climate Considerations
Most grading guides skip the paperwork, a mistake, because grading is regulated in ways that catch homeowners off guard.
When Grading Requires a Permit
A permit is typically triggered when you change the direction or volume of stormwater leaving your property, move soil above a threshold volume, or work inside a floodplain or drainage easement.
Two rules of thumb: never block or redirect a drainage easement, and never push fill so it raises water onto a neighbor’s lot.
Soil Compaction: The Step That Decides Whether the Grade Holds
Compaction is where most DIY grading fails. The goal is not maximum hardness but a target density that supports the load above without settling, while still letting water and roots move through.
A few mechanics matter:
- Moisture content controls everything. Soil compacts best at a specific moisture window. Too dry and the particles will not bind; too wet and the soil pumps and stays soft. If you squeeze a handful and it crumbles, it is too dry. If it drips, it is too wet.
- Lift thickness matters more than passes. Spreading fill in thin lifts of about 4 to 6 inches and compacting each one beats dumping a foot of soil and running over it. Thick lifts leave loose zones underneath that settle later.
- Over-compaction is a real risk. Driving heavy equipment repeatedly over the same path, or compacting saturated clay, can create a nearly impermeable layer. Water then sits on top instead of infiltrating, and plant roots struggle to establish. In planting beds, keep compaction moderate; under pavers and foundations, aim for high density.
- Different soils behave differently. Sandy soils drain fast and compact predictably. Clay holds water, expands and contracts with moisture, and is prone to heaving and settling. Silty soils are the most erosion-prone. Knowing which you have tells you how much amendment and how much compaction the job needs.
Large structural jobs under pavers, driveways, or foundations are often density-tested rather than eyeballed. For a residential regrade, the practical test is simple: after compaction, you should not be able to push a screwdriver more than an inch or so into the soil by hand.
Climate Changes the Plan
Grading is not one-size-fits-all. The same slope that works in a dry climate can fail in a wet one, and vice versa.
In high-rainfall regions with a high water table, the priority is moving water off the surface fast.
In arid regions, the opposite problem dominates. Intense cloudbursts drop a lot of water in minutes, and bare graded soil erodes quickly.
DIY vs. Hiring a Professional Land Grader
Small touch-ups are fine to do yourself. Fixing a low spot with a few wheelbarrows of topsoil is a weekend job. But full regrading, especially near a foundation or under a future patio, is where pros earn their keep.
Hire a professional when:
- Water is reaching your foundation
- The yard needs major earthwork or new drainage
- You plan to install pavers, a driveway, or a patio
- The slope is steep or the lot has a high water table
This is where we come in. Venice Pavers has spent over 30 years building hardscapes with base prep and drainage as the priority. We are a certified Tremron installer, licensed and insured, and we back our work with a lifetime workmanship guarantee.
Frequently Asked Questions
What does it mean if land is graded?
Grading means reshaping the surface of your land to create a specific slope, or pitch, that controls how water moves across the property. Correct grading directs surface water away from your foundation and toward drainage points like swales or storm drains. It also creates a stable subgrade for patios, driveways, or turf. Without proper grading, water pools, soil erodes, and foundations can suffer hydrostatic pressure damage over time.
Can I regrade my yard myself?
Small, flat areas with mild drainage issues are often manageable as a DIY project using a tiller, rake, and transit level. Larger jobs involving significant excavation, compaction equipment, or slopes steeper than about 2 percent are better left to professionals. Before starting, check local permitting requirements, since some municipalities require a grading permit for changes that affect stormwater runoff.
What is the ideal slope for yard drainage?
A slope of 2 to 5 percent away from the foundation is generally recommended for positive drainage. That equals roughly 2 to 5 inches of drop per 10 feet of run. Less than 2 percent and water may pool; more than 5 percent and soil erosion becomes a concern. In Southwest Florida’s flat terrain and sandy soils, hitting that range correctly is critical to preventing standing water after heavy rain.
How do you check for proper drainage after grading?
Run a hose or sprinkler at the high point of the graded area and watch where the water flows. It should move steadily away from structures and toward your intended drainage path without pooling. You can also use a laser level or transit level to verify the slope at multiple points. After a heavy rain, check for low spots, erosion channels, or water collecting near the foundation, and adjust as needed.
Water that pools against your foundation will find a way in, and a bad slope will undo even the best pavers. Venice Pavers plans grading and drainage before a single paver goes down, using 30 years of hardscape experience, certified Tremron installation, and a lifetime workmanship guarantee. Get started with Venice Pavers and build an outdoor space that drains right and lasts.