
Table of Contents
- What to Know Before You Hire Local Paver Installation Contractor
- Questions to Ask a Paver Contractor Before You Sign
- What a Paver Installation Estimate Should Include
- How to Check Paver Contractor Reviews and References
- Paver Installation Timeline: What to Expect Week by Week
- Paver-Specific Installation Quality Checks
- Red Flags and Dispute Prevention When You Hire Local Paver Installers
- Frequently Asked Questions
Last Updated: October 6, 2026
What to Know Before You Hire Local Paver Installation Contractor
Choosing the right paver contractor starts with understanding your project type, because residential and commercial work demand different skills, insurance levels, and timelines. At Venice Pavers, we have spent over 30 years installing patios, driveways, walkways, and retaining walls across Southwest Florida, and we have watched too many homeowners learn this lesson the hard way.
Here is the core problem: paver work looks simple from the outside. Sand, stone, done. In reality, the base preparation and drainage planning underneath the surface decide whether your patio still looks level in ten years or sinks within two. Most hiring guides skip that part. This one will not.
Below, we break down exactly how to vet a paver installer, what a proper estimate should contain, and the red flags that signal corners are about to be cut on your property.
Residential vs. Commercial Paver Projects
Residential projects usually involve driveways, patios, pool decks, and walkways on a single property. Commercial projects cover parking areas, entrances, and high-traffic walkways at retail, hospitality, and institutional sites.
The distinction matters when you hire local paver installers because commercial work typically requires higher insurance limits, phased scheduling to keep a business open, and materials rated for heavier loads. A contractor who only does residential patios may not carry the coverage or equipment for a commercial lot. Ask which type of work makes up most of their portfolio, then check that their experience matches your job.
Questions to Ask a Paver Contractor Before You Sign
The right questions separate a professional paver installer from someone who owns a truck and a shovel. Ask these before any contract is signed:
- How deep will you excavate, and what base material will you use?
- How do you handle grading and drainage on a site like mine?
- Will you install edge restraints and joint sand, and which type?
- Who handles permits, and who pulls them?
- What does your workmanship guarantee cover, and for how long?
- Can you provide references from projects similar to mine?
A confident contractor answers these without hesitation. Vague answers about “doing it the right way” without specifics are a warning sign.
Licensing, Insurance, and Permit Checks
Verify licensing and insurance before work begins, not after. Ask for a certificate of insurance showing general liability coverage, and confirm the license is active with the appropriate state or local authority.
Permits matter too. Many jurisdictions require permits for structural elements like retaining walls, and some require them for driveway or right-of-way work. A contractor who suggests skipping the permit to save time is putting you at risk. If a wall fails or a neighbor disputes a property line, an unpermitted installation becomes your problem, not theirs.
What a Paver Installation Estimate Should Include
A complete paver installation estimate breaks the job into materials, labor, excavation, base preparation, and cleanup. If your quote is a single lump sum with no breakdown, ask for detail. The table below shows what a line-item bid should specify, use it as a checklist when you compare bids side by side.
|
Estimate Line Item |
What It Should Specify |
|---|---|
|
Excavation |
Depth, spoil removal, disposal method |
|
Base material |
Type of aggregate, compacted depth, number of lifts |
|
Pavers |
Brand, style, thickness, color, and whether an allowance is set |
|
Edge restraints |
Material and installation method (spiked, glued, or concrete-embedded) |
|
Joint sand |
Type (polymeric vs. regular) and application method |
|
Drainage |
Grading plan, slope percentage, any drain or French drain work |
|
Labor |
Crew size, estimated days on site |
|
Permits |
Who pulls them, cost responsibility |
|
Cleanup and restoration |
Haul-away, sod or landscape repair, final wash-down |
How to Compare Two Bids Line by Line
Never compare quotes on the bottom-line price alone. Two bids that differ substantially usually differ in base depth, material quality, or what is excluded. Lay both bids next to each other and walk down the same line items:
- Base depth and lifts. One bid may specify 3 inches of compacted aggregate in two lifts; another may say “proper base” with no number. The vague bid is not comparable, ask for a number.
- Allowances. If a bid lists an allowance for pavers, that is a placeholder, not a locked price. Ask what happens if your chosen paver costs more than the allowance.
- Exclusions. Look for what is not listed: drainage corrections, haul-away, permit fees, irrigation repair, or restoration of surrounding landscaping. Excluded items become change orders later.
- Contingency language. Bids that say “additional work billed at hourly rate” without a cap give the contractor open-ended pricing power.
Contract Terms to Insist On
The contract should state the total price, payment schedule, start and completion dates, warranty terms, and how change orders get handled. A reasonable schedule ties payments to milestones rather than a large upfront deposit. Most practitioners find that a deposit covering materials mobilization is normal, while a request for most of the job cost upfront is not.
Make sure the written contract covers:
- Scope of work matching the accepted bid, line by line
- Payment schedule tied to milestones (excavation complete, base approved, pavers laid, final walkthrough)
- Change order process, who signs, how pricing is set, and whether work pauses until approval
- Written warranty stating what is covered (workmanship vs. materials), for how long, and how claims are made
- Lien waivers from subcontractors and material suppliers upon final payment
- Dispute resolution, mediation or arbitration clause, and which state’s law governs
Get everything in writing, including verbal promises made during the walkthrough. If a contractor resists putting a promise in the contract, treat that as information about how the rest of the job will go.
Free consultation & estimate →
How to Check Paver Contractor Reviews and References
Reviews and references are your best filter, but only if you read them critically. Look for patterns, not individual complaints. A single unhappy customer can happen to anyone. Repeated mentions of the same issue, such as poor drainage or unfinished punch lists, tell you something real.
Ask for three references from projects completed at least a year ago, then call them. Ask specifically whether anything went wrong and how the contractor responded. How a company handles a problem tells you more than how it handles a smooth job. Our own portfolio includes work for Starbucks, Saratoga Memorial Hospital in Venice, and the Ritz Carlton, and we encourage prospective clients to ask those references the same hard questions.
Paver Installation Timeline: What to Expect Week by Week
Most residential paver projects take one to three weeks from excavation to final compaction, depending on size, site access, and weather. Commercial projects and complex drainage corrections run longer. The schedule below pairs each phase with the quality checkpoints you should verify before the crew moves to the next step, because once pavers are laid, correcting a bad base means tearing the whole job out.
- Phase 1, Site preparation and excavation (1-2 days). Verify the excavated depth matches the bid and that soil is removed, not just pushed aside. Confirm utilities were marked before digging.
- Phase 2, Base installation and compaction (2-4 days). This is the phase that decides whether your patio lasts. Watch for aggregate placed in lifts (typically 2-4 inches at a time) and compacted with a plate compactor between lifts. Ask the crew to show you the compacted depth before pavers go down.
- Phase 3, Grading and slope verification (same as base). A properly graded surface slopes away from the house and any structures. A common rule of thumb is roughly 1 inch of fall per 4 feet of run, though your contractor should confirm the target for your site. Standing water after a hose test is a red flag.
- Phase 4, Edge restraints and paver laying (2-5 days). Edge restraints should be concrete, not just butted against the pavers. Check that cut pieces at borders are clean and that joint spacing is uniform.
- Phase 5, Joint sand, final compaction, and cleanup (1-2 days). Joint sand should fill the gaps fully and be compacted into place. A final pass with a plate compactor settles the pavers into the bedding layer.
What to Inspect at Each Phase
You do not need to be on site every hour, but you should walk the job at three moments: after excavation, after base compaction, and after final cleanup. At each visit, take photos and note anything that looks off in writing to the contractor.
Ask your contractor for a written schedule with milestones, and build in a buffer for rain delays, which are common in this region. If the schedule slips, ask why in writing, repeated vague answers about weather when the forecast was clear are a warning sign.
Paver-Specific Installation Quality Checks
Quality shows up in details you can inspect yourself. Walk the finished surface and check for uniform joint spacing, a consistent slope away from structures, and tightly locked edge restraints. Run a straightedge across the surface; it should not rock or reveal dips.
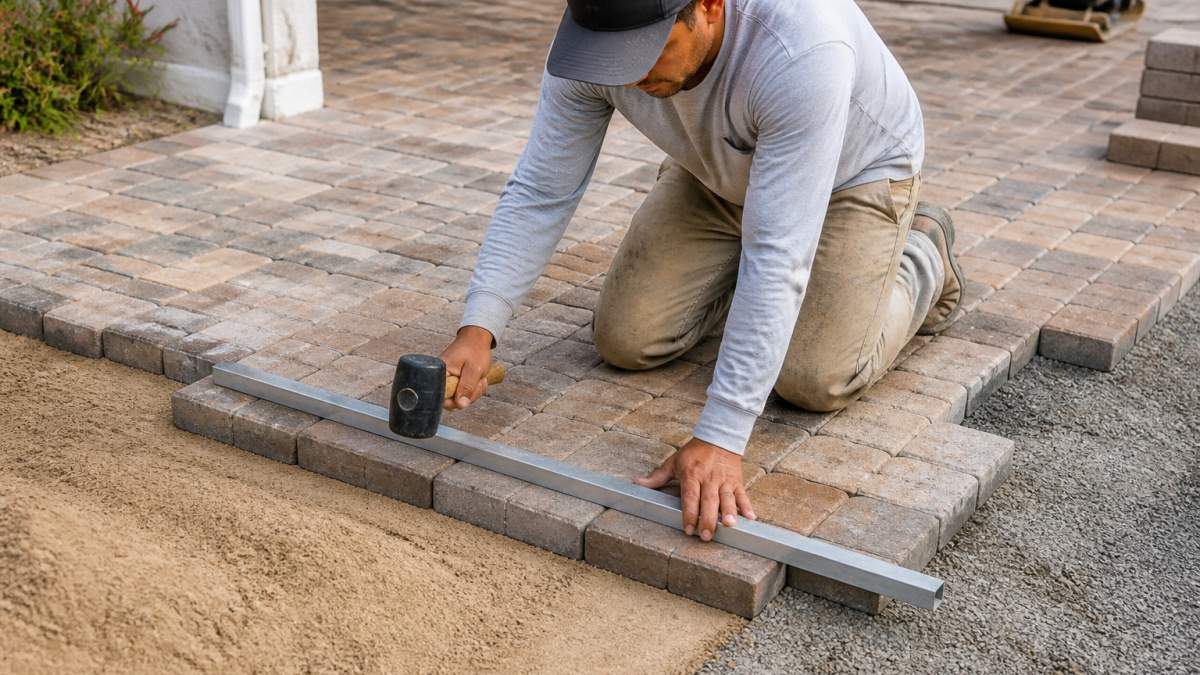
Base preparation is where most failures begin. A properly compacted aggregate base, installed in lifts and graded for drainage, keeps pavers stable for decades. If a crew skips compaction passes or lays pavers directly over loose soil, sinking and shifting follow within a season or two.
Red Flags and Dispute Prevention When You Hire Local Paver Installers
Avoid contractors who demand large upfront cash payments, pressure you to sign the same day, or offer no written contract. Be equally wary of quotes that come in far below every other bid; that gap usually means thinner base, cheaper materials, or skipped steps.
Prevent disputes by documenting everything. Photograph the site before work begins, keep all change orders in writing, and confirm the warranty terms in the contract. If a problem arises, address it in writing with the contractor first. Most issues get resolved when expectations were clear from the start.
Frequently Asked Questions
How do I find a reliable paver installation contractor near me?
Start by asking for referrals from neighbors or local hardware stores, then verify each candidate’s license, insurance, and portfolio. Check reviews on Google and the Better Business Bureau, and request references from projects completed at least two years ago. A reliable contractor will provide a written estimate, explain their base preparation and drainage approach, and not pressure you to sign immediately.
What should a paver installation estimate include?
A thorough paver installation estimate should list labor, materials (pavers, base aggregate, joint sand, edge restraints), equipment, excavation and disposal fees, permit costs if applicable, and a project timeline. It should also specify the square footage, paver type, and any site preparation needed. Ask whether the quote includes cleanup and whether any change orders would be priced separately.
How long does a typical paver installation take?
The timeline for residential paver projects varies depending on size, site access, and weather. The installation process includes excavation, base compaction, laying pavers, cutting, and joint sand. Ask your contractor for a written schedule and how they handle rain delays.
What are red flags when hiring a paver contractor?
Watch for contractors who demand a large cash deposit upfront, refuse to provide a written contract, cannot show proof of insurance, or give a quote far below others without explanation. Also be wary of anyone who skips a site visit, promises no disruption, or pressures you to decide on the spot. Trust your instincts and always verify credentials before signing.
Hiring the right paver contractor comes down to verification: check the license, inspect the base work, and read the contract before you sign. Venice Pavers brings over 30 years of hardscape experience, certified Tremron installation, and a lifetime workmanship guarantee to every project, backed by obsessive attention to base preparation and drainage planning. Get started with Venice Pavers and a free consultation and estimate for your driveway, patio, or walkway.