
Table of Contents
- What You’ll Need Before Starting Your Paver Installation
- Residential Driveway Base Preparation: The Foundation of Long-Lasting Pavers
- Pavers vs Concrete for Driveways: Which Option Works Best for Your Budget
- Selecting the Right Paver Materials for Affordable Installation
- Concrete Pavers: The Affordable Workhorse
- Brick Pavers: Aesthetic Premium with Durability Trade-Offs
- Natural Stone Pavers: Premium Option with Regional Suitability Considerations
- Permeable Pavers: Cost-Effective Drainage Solution
- Material Selection by Climate and Soil Type
- Cost Breakdown: Materials Only
- Step-by-Step Installation Process for Your Driveway
- Paver Driveway Maintenance Tips to Extend Your Investment
- DIY vs Professional Installation: Making the Right Choice
- Common Mistakes to Avoid During Paver Installation
- Frequently Asked Questions
Last Updated: September 30, 2026
What You’ll Need Before Starting Your Paver Installation
A successful affordable paver installation for residential driveways requires gathering essential tools: shovel, wheelbarrow, level, measuring tape, hand tamper or plate compactor, rubber mallet, and broom.
You’ll need crushed stone (4-6 inches), polymeric sand for joints, and edge restraints for the perimeter.
Calculate your driveway’s square footage and order materials with a 10% buffer for waste.
Residential Driveway Base Preparation: The Foundation of Long-Lasting Pavers
A solid foundation determines whether your driveway lasts 20 years or fails within five. Base preparation is where most DIY projects fail.
Excavation and Grading
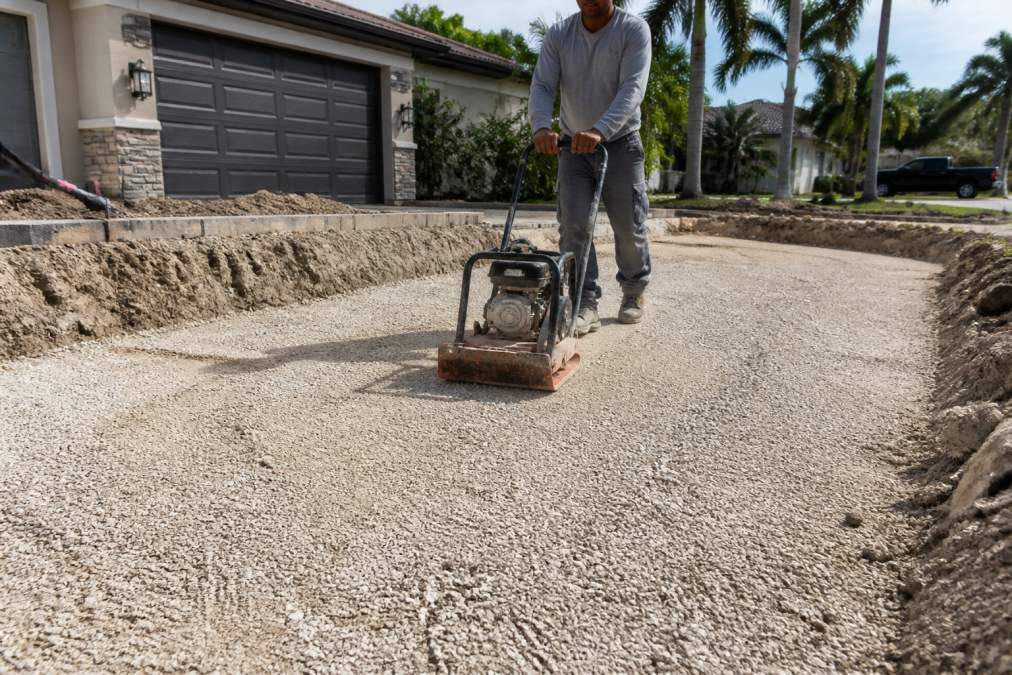
For residential driveway base preparation, excavate 5-7 inches deep and grade the surface to slope 1/8 inch per foot toward the edges. Poor grading causes water pooling. Use a level and straightedge to verify proper slope before proceeding.
Compaction and Sub-Base Installation
Lay 3-6 inches of crushed stone and compact in 2-inch lifts with a plate compactor. Inadequate compaction leads to settling and uneven surfaces. A properly compacted sub-base ensures pavers remain level and functional for decades.
Pavers vs Concrete for Driveways: Which Option Works Best for Your Budget
The choice between pavers and concrete affects upfront cost and long-term durability. Understanding the trade-offs helps you align your decision with your climate and budget.
Upfront Cost Comparison
Concrete can crack and stain easily. Pavers allow individual replacement, accommodate soil movement, and are reusable if utilities need access.
Regional Climate Matters More Than You Think
In stable, warm climates, concrete’s lower cost makes sense, though pavers offer better aesthetics and easier repairs.
The Permeable Paver Advantage: Solving Drainage Problems While Saving Money
Permeable pavers allow water to drain through the surface into the soil, eliminating expensive grading or drainage systems. They solve drainage problems that would otherwise require extensive site work.
Long-Term Cost: The Real Affordability Calculation
For pavers vs concrete for driveways, choose pavers if you have drainage issues; choose concrete in stable climates if you prioritize lowest upfront cost. Pavers require sealing every 2-3 years; concrete requires ongoing crack sealing but will continue to crack.
Selecting the Right Paver Materials for Affordable Installation
Match paver type to your climate, soil conditions, and traffic load, not just cost.
Concrete Pavers: The Affordable Workhorse
Choose pavers with 8,000+ PSI compressive strength for affordable paver installation for residential driveways, they last significantly longer.
Brick Pavers: Aesthetic Premium with Durability Trade-Offs
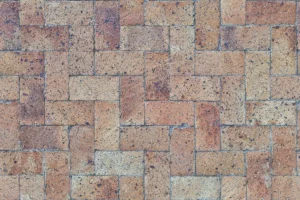
Brick pavers offer a classic, timeless aesthetic. They’re softer than concrete, so they wear faster under heavy traffic. Clay brick is beautiful and durable because it’s fired at high temperatures, making it less prone to water absorption than concrete.
Brick pavers are best suited for properties where aesthetics are the priority and traffic is moderate. They require more maintenance (sealing every 2-3 years) and are prone to efflorescence, a white salt residue that appears on the surface over time. This is cosmetic but difficult to remove.
For affordability, brick makes sense only if you’re willing to pay the premium for appearance and accept higher maintenance costs.
Natural Stone Pavers: Premium Option with Regional Suitability Considerations
Natural stone pavers, granite, limestone, bluestone, or slate, are a premium option. They’re durable, elegant, and add significant curb appeal. However, they’re not universally suitable for all climates.
Granite is the most durable natural stone. Limestone and bluestone are softer and more prone to spalling (surface flaking). Slate is beautiful but extremely slippery when wet, creating a safety hazard on driveways.
For affordable paver installation for residential driveways, natural stone doesn’t make financial sense unless aesthetics are your top priority and you’re willing to invest in premium materials. If you choose natural stone, match the stone type to your climate: granite for more demanding regions, limestone or bluestone for stable climates.
Permeable Pavers: Cost-Effective Drainage Solution
Permeable pavers allow water to pass through the surface into the sub-base, reducing standing water and improving drainage. They solve drainage problems that would otherwise require expensive site work.
Permeable pavers come in two types: porous concrete (water passes through the paver itself) and permeable grid systems (water drains around the paver into the sub-base). Porous concrete is more durable but requires careful maintenance to prevent clogging. Permeable grid systems are easier to maintain but less stable under heavy traffic. Choosing the right material often depends on the local climate, which is why homeowners should prioritize durable hardscape designs to ensure long-term stability against environmental wear.
For properties with poor drainage, clay-heavy soil, or standing water issues, permeable pavers are the most affordable long-term solution. They eliminate the need for grading work or subsurface drainage systems.
Material Selection by Climate and Soil Type
Your region’s soil composition should guide your material choice:
Stable, warm climates: Concrete pavers, brick, or limestone work equally well. Slate is acceptable if you address the slipperiness with a non-slip coating.
Clay-heavy or poorly draining soil: Permeable pavers are your best value. They solve drainage problems without expensive site work.
Free consultation & estimate →
Sandy soil with good drainage: Standard concrete pavers are sufficient. Permeable pavers offer no advantage and cost more.
Cost Breakdown: Materials Only
For a 500-square-foot driveway:
- Concrete pavers (standard grade): $1,500-$3,000
- Brick pavers: $3,000-$6,000
- Natural stone (granite): $7,500-$15,000
- Permeable concrete pavers: $1,750-$3,500
These figures are material cost only. Labor, excavation, base preparation, and disposal add $3,000-$8,000 depending on site conditions and local labor rates.
Compare options based on durability, maintenance requirements, climate suitability, and how they align with your home’s architecture. The cheapest material upfront isn’t always the most affordable over time, especially where durability directly impacts long-term cost.
Step-by-Step Installation Process for Your Driveway
With your base prepared and materials selected, installation follows a straightforward sequence. This is where attention to detail determines whether your pavers stay level or shift within a year.
Laying the Pavers
Begin at one corner and work systematically across the driveway. Lay pavers on the compacted sub-base in your chosen pattern, running bond, herringbone, or basket weave are common options. Use a rubber mallet to tap each paver level with its neighbors.
Check your work frequently with a level. Even small variations compound across hundreds of pavers. If a paver sits too high, remove it, add or remove sand from the base, and reset it.
Work in manageable sections, perhaps 50 to 100 square feet at a time. This keeps you focused and prevents mistakes from spreading across the entire driveway.
Finishing with Joint Sand and Edge Restraints
Once all pavers are set, install edge restraints along the perimeter. These prevent pavers from shifting outward under vehicle weight. Concrete or plastic restraints work equally well, choose based on your aesthetic preference.
Sweep polymeric sand across the surface, working it into joints between pavers. Polymeric sand hardens when wet, locking pavers in place and preventing weeds from growing through gaps. Follow the manufacturer’s instructions for moisture application, too much water weakens the bond, too little leaves gaps.
The finishing stage determines whether your driveway looks professional or rushed. Take time here. A broom, water source, and patience make the difference.
Paver Driveway Maintenance Tips to Extend Your Investment
Regular maintenance keeps your driveway looking new and prevents costly repairs. Most paver driveway maintenance tips focus on preventing water damage and keeping the surface clean.
Seal your pavers every 2 to 3 years. Sealing protects against UV fading, staining, and water penetration. It’s not mandatory, but it extends the life of your pavers significantly.
Sweep debris regularly and wash the surface with a garden hose. For stubborn stains, use a pressure washer on a low setting, high pressure can dislodge sand from joints.
Check for weeds growing through joints and remove them promptly. If weeds become persistent, reapply polymeric sand to fill gaps where seeds take root.
Inspect the driveway after heavy rain. If pavers settle or shift, address it quickly. A single settled paver can cause water to pool, accelerating damage to surrounding pavers.
DIY vs Professional Installation: Making the Right Choice
The decision to DIY or hire a professional depends on your skill level, available time, and tolerance for mistakes. Both paths have merit.
DIY installation saves labor costs but demands precision and patience. You’ll need to rent or purchase a plate compactor, spend time learning proper technique, and accept that mistakes will happen. A poorly prepared base or uneven paver layout becomes obvious within a season.
Professional installation costs more upfront but guarantees results.
Common Mistakes to Avoid During Paver Installation
Learning from others’ mistakes saves time and money. The most common errors fall into a few categories.
Frequently Asked Questions
What factors influence the total cost of a paver driveway installation?
Installation costs depend on square footage, soil conditions, material selection, drainage requirements, and labor complexity. Regional soil suitability affects excavation depth and base preparation needs. Permeable pavers cost more upfront but reduce drainage work. Professional installation includes site grading and compaction expertise that DIY projects often miss. Get a free consultation to assess your specific property conditions and receive an accurate estimate.
How does the durability of pavers compare to asphalt for residential driveways?
Pavers typically last 25+ years with proper maintenance, while asphalt requires replacement every 15-20 years. Pavers resist freeze-thaw cycles better in varied climates and individual pavers can be replaced if damaged, whereas asphalt must be resealed every 3-5 years. Pavers offer superior load-bearing capacity and curb appeal, though they require periodic joint sand maintenance and sealing to prevent weed growth and settling.
What is the most cost-effective paver material for residential projects?
Interlocking concrete pavers offer the best value for affordability without sacrificing durability. They cost less than natural stone or stamped concrete alternatives while providing excellent load-bearing capacity and design flexibility. Permeable pavers cost more initially but eliminate expensive drainage installation, saving money long-term. Material choice depends on your property’s drainage needs, aesthetic goals, and maintenance preferences.
Is it more affordable to DIY a paver driveway or hire a professional?
While DIY saves labor costs, professional installation protects your investment through proper base preparation, compaction, and drainage planning. Improper sub-base installation leads to settling, cracking, and expensive repairs within 2-3 years. Professionals ensure correct paver thickness, edge restraints, and site grading to prevent water damage. For residential driveways, professional installation typically costs less over the driveway’s lifetime despite higher upfront expenses.