
Table of Contents
- What You’ll Need Before Breaking Ground
- Paver Driveway Base Preparation: The Step Most Installers Rush
- Paver Driveway Compaction: Why Plate Compactors Aren’t Enough
- Paver Driveway Drainage: Slope, Grading, and Where Water Actually Goes
- How to Keep Pavers From Shifting: Edge Restraints and Joint Sand
- Common Installation Mistakes to Avoid
- Maintenance That Extends Paver Driveway Life
- When to Call a Professional
- Frequently Asked Questions
Last Updated: October 8, 2026
What You’ll Need Before Breaking Ground
A long lasting paver driveway installation tips guide starts with one hard truth: the surface you drive on is the least important part of the job. The base under it decides whether your paver driveway still sits flat in ten years or ripples like a washboard after two wet seasons. At Venice Pavers, we have spent over 30 years building hardscapes in Southwest Florida, and we can tell you the failures we get called to fix almost always trace back to shortcuts taken before the first paver was laid.
Before you break ground, gather these items and make these decisions:
- Excavation tools: shovel, wheelbarrow, marking paint, string lines
- Plate compactor (rentable) and a hand tamper for edges
- Laser level or a long straightedge and spirit level
- Class II road base or crushed stone, plus bedding sand
- Edge restraints, spikes, and polymeric joint sand
- Pavers, plus a wet saw for cuts
- A plan for where excavated soil will go
Two decisions matter more than the tool list. First, what is your soil? Sandy ground drains fast. Clay holds water and needs more excavation depth. Second, where will water go when it leaves the driveway? If you cannot answer that, stop and figure it out. The Federal Emergency Management Agency guidance on drainage and flood risk treats poor site drainage as a leading cause of property damage, and driveways are part of that picture.
Order 5 to 10 percent extra pavers. Cuts break, colors vary slightly between production runs, and matching a batch two years later is nearly impossible.
Paver Driveway Base Preparation: The Step Most Installers Rush
Base preparation is the excavation, grading, and compacted gravel layer that carries every load your driveway will ever see. Get it right and the pavers are almost decorative. Get it wrong and no amount of expensive stone on top will save you.
Here is the sequence we follow:
- Excavate 8 to 12 inches deep, more on soft ground.
- Grade the subgrade so it sheds water away from the house.
- Compact the bare soil before adding anything.
- Add gravel in 4-inch lifts, compacting each one.
- Screed a 1-inch bedding sand layer, never thicker.
- Set, cut, and compact the pavers into the sand.
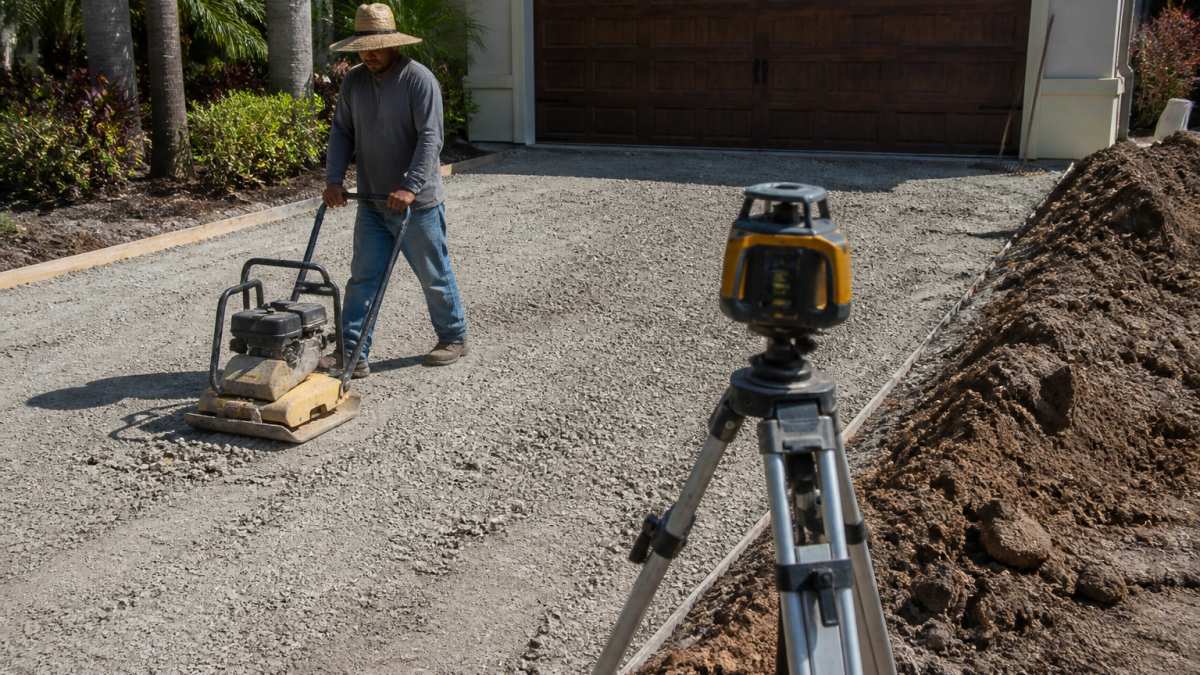
The mistake we see most is thin base. A driveway carrying a pickup truck needs far more support than a walkway. Skip a lift and the surface will settle in the wheel tracks first.
Paver Driveway Compaction: Why Plate Compactors Aren’t Enough
Compaction is the process of forcing soil and gravel particles tight together so they stop moving under load. A plate compactor alone will not get you there. It compacts the top inch or two. The layers below stay loose and settle later.
What actually works:
- Compact in lifts, never one deep dump
- Water the gravel lightly as you go
- Use a vibratory roller for large driveways
- Compact the subgrade, each gravel lift, and the finished pavers
- Re-run the plate compactor over the surface after joint sand goes in
Skip the lift-by-lift approach and the base will keep compressing for years. That is why some driveways look perfect in spring and dip by fall.
Paver Driveway Drainage: Slope, Grading, and Where Water Actually Goes
Drainage is the slope and grading plan that moves water off the driveway and away from your foundation. A paver driveway should fall about 1 to 2 percent, roughly 1/8 to 1/4 inch per foot, away from the house. Too flat and water pools. Too steep and it runs fast enough to erode the edges.
Three things to plan:
- Direction: water should leave toward the street, a swale, or a drain.
- Slope: keep it steady, no low spots in the middle.
- Outlet: know exactly where the water lands.
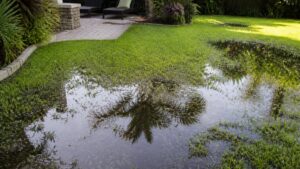
Southwest Florida’s afternoon storms dump a lot of water in a short time. If your grade sends runoff toward the garage or a low corner of the yard, you will find out the hard way. A proper grading plan is not optional here.
Never let water drain toward the house. Even a slight backslope can push water under the slab and into the garage, and fixing it later means pulling up pavers.
How to Keep Pavers From Shifting: Edge Restraints and Joint Sand
Pavers stay put when the edges are locked and the joints are filled. Without both, the field of pavers slowly spreads, and the outer rows walk outward season after season.
The two-part fix:
Free consultation & estimate →
- Edge restraints: a concrete curb or spiked plastic edging set against the paver border. This is the wall that stops lateral movement.
- Joint sand: polymeric sand swept into the gaps and activated with water. It hardens slightly and locks each paver to its neighbors.
A common mistake is skipping the restraint on a curved border because it is fussy to set. That curve is exactly where pavers creep first. Fill joints completely, sweep off the excess, and mist carefully so you do not wash the sand out. Proper attention to these structural details ensures long-term stability, a principle that remains central to managing construction projects effectively throughout the upcoming season.
Common Installation Mistakes to Avoid
Most failing driveways share the same short list of errors. Watch for these:
- Thin or single-lift base that settles under vehicle weight
- No compaction of the subgrade before gravel goes down
- Bedding sand too thick, which lets pavers rock
- Missing or weak edge restraints
- Flat grading with no positive slope
- Joints left half-filled or filled with regular sand
Each one looks minor on installation day. Each one shows up within a few years as dips, shifting, or standing water. If a quote seems low, ask what depth of base is included. The answer usually explains the price.
Maintenance That Extends Paver Driveway Life
A paver driveway is one of the lowest-maintenance hardscapes you can own, but a little care goes a long way. Plan on this schedule:
| Task | How Often | Why It Matters |
|---|---|---|
| Sweep or rinse surface | Monthly | Stops grit from scratching |
| Top off joint sand | Yearly | Keeps pavers locked |
| Check edge restraints | Yearly | Catches spreading early |
| Pull weeds from joints | As needed | Protects the sand layer |
| Re-sand worn areas | Every 2-3 years | Restores the lock |
What most guides miss is the joint sand. Homeowners treat it as a one-time job. In practice, rain and traffic slowly wash it down, and once the joints empty out, the pavers start to move. Keep them full and the driveway holds its shape for decades.
Base, drainage, and joint sand do almost all the work. Nail those three and your paver driveway will outlast the house’s paint job many times over.
When to Call a Professional
Some jobs are worth doing yourself. A paver driveway usually is not, unless you have the equipment and the patience for lift-by-lift compaction. The reason is simple: the parts that fail are buried under the pavers. You cannot see a bad base until it has already cost you the surface.
Call a professional when:
- Your soil is clay or your lot has tricky grading
- The driveway carries heavy vehicles
- You have had drainage problems before
- The area is large enough to need a roller
- You want a workmanship guarantee
This is where Venice Pavers comes in. We are a licensed landscape contractor and a Certified Tremron installer, and we have built driveways, patios, walkways, and retaining walls for clients including Starbucks, the Ritz Carlton, and Waterford Golf Club. Every project starts with base preparation and a drainage plan, and every job is backed by our lifetime workmanship guarantee.
A paver driveway only fails for a handful of reasons, and almost all of them live under the surface. If you want a driveway that still looks new in 2040, the answer is not fancier pavers. It is a deeper base, honest compaction, and a drainage plan built for how hard it rains here. Venice Pavers handles the whole process, from free consultation and estimate through custom design, meticulous base prep, and a lifetime workmanship guarantee. Get started with Venice Pavers and build a driveway that holds its shape for the long haul.
Frequently Asked Questions
How deep should the base be for a paver driveway?
For a residential paver driveway, the base typically needs to be 6 to 8 inches of compacted aggregate after excavation, though the exact depth depends on your soil conditions and how much weight the driveway will carry. In Southwest Florida, sandy soils often require a deeper, well-compacted base to prevent settling. The base depth should be calculated so that after compaction and adding the bedding sand, the finished paver surface sits at the right height relative to your garage floor and street.
How do you keep driveway pavers from shifting?
Three things prevent shifting: a properly compacted base, solid edge restraints, and joint sand that’s been vibrated into place. Edge restraints are especially important because they lock the outer pavers and stop the whole field from spreading. After installation, sweeping polymeric or washed sand into the joints and compacting again locks the pavers together. Skipping any of these steps is the most common reason pavers shift within a year or two.
How much slope should a paver driveway have for drainage?
A paver driveway should slope away from your home at a minimum of 1 to 2 percent, which is about 1/8 to 1/4 inch per foot. That slope directs water toward the street, a swale, or a drainage feature rather than letting it pool against your foundation. In areas with heavy summer rain, the grading plan matters as much as the pavers themselves. A professional installation includes a drainage plan before any base material goes down.
Do paver driveways need edge restraints?
Yes. Edge restraints are not optional. They hold the perimeter pavers in place and prevent the entire driveway from creeping outward over time. Without them, even a perfectly compacted base will eventually allow pavers to spread, especially under vehicle traffic. Common edge restraints include concrete curbs and spiked plastic edging set into the base. This is one of the details that separates a driveway that lasts decades from one that needs repairs in a few years.