Table of Contents
- Assess Your Site and Property Constraints
- Understanding Circular Driveway Dimensions and Space Requirements
- Plan Your Half Circle Driveway Layout and Traffic Flow
- Design Circular Driveway Drainage for Long-Term Performance
- Create a Sloped Driveway Layout That Works With Your Terrain
- Choose Materials and Design Elements for Curb Appeal
- Common Design Mistakes to Avoid
- Next Steps: From Design to Installation
- Frequently Asked Questions
Last Updated: October 15, 2026
Assess Your Site and Property Constraints
Before you sketch a single line, walk your property and measure what you’re actually working with. A circular driveway layout depends entirely on your site’s real dimensions, slope, and how your house sits relative to the road.
Start by noting these key constraints:
- Lot size and shape. Is your property rectangular, irregular, or sloped? A tight corner lot needs a different approach than a sprawling suburban property.
- House position. How far is your front entry from the road? Where does the main garage sit?
- Existing utilities. Underground lines for water, gas, electric, and sewer determine where you can dig.
- Sight lines. Can drivers see oncoming traffic when entering and exiting? Poor sightlines create safety risks.
- Slope and drainage. Does water naturally flow toward or away from your home? This shapes your grading strategy.
Most homeowners skip this step and regret it later. You can’t design properly without understanding what you’re working with.
Grab a tape measure, note the dimensions, and sketch a rough overhead view. You don’t need perfect accuracy, just realistic proportions. This becomes your design foundation.
Understanding Circular Driveway Dimensions and Space Requirements
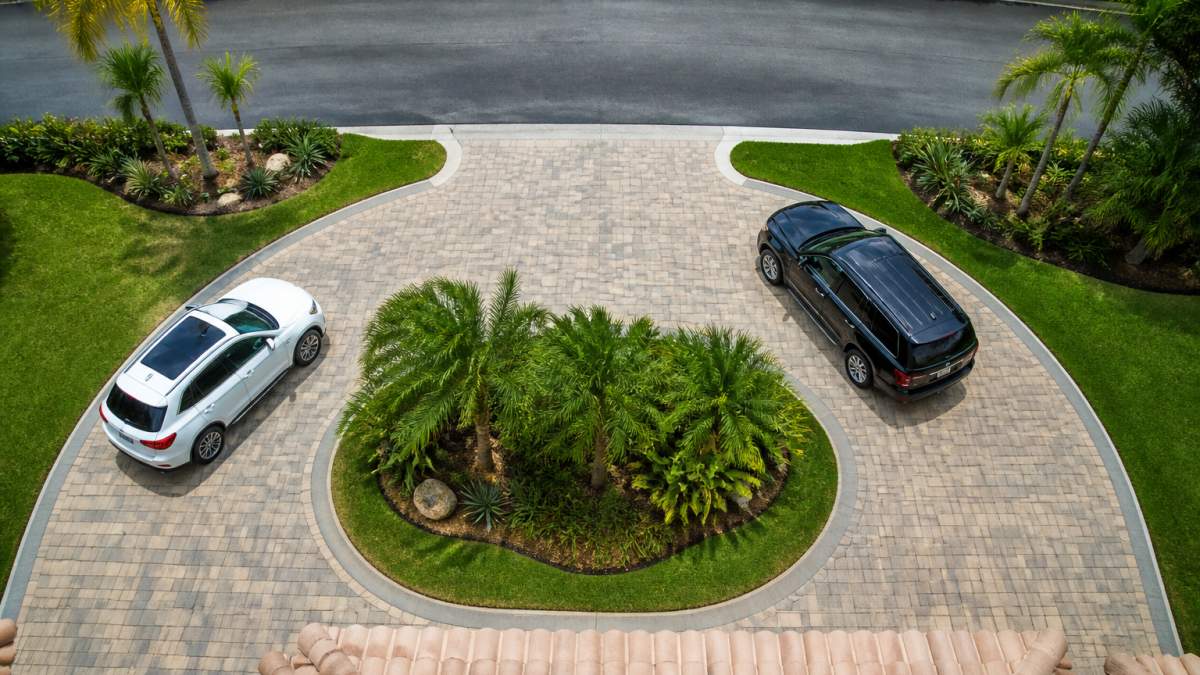
A circular driveway dimensions challenge is real: you need enough room for vehicles to enter, turn, and exit without backing up or making multiple turns. Too small and it becomes impractical.
Standard vehicle dimensions drive these requirements:
- Standard sedan: 17.5 feet long, 6 feet wide
- SUV/crossover: 18-19 feet long, 6.5 feet wide
- Pickup truck: 19-22 feet long, 6.5-8 feet wide
- Delivery truck: 25-30 feet long, 8 feet wide
The turning radius, how much space a vehicle needs to make a U-turn, is what actually constrains your layout. A sedan needs roughly a 20-foot radius to turn comfortably.
For a half-circle layout, the diameter of your circular portion should be at least 40 feet to accommodate two-way traffic and a comfortable turn.
The entry and exit points should be at least 12 feet wide each. Narrower entries force vehicles to slow down and angle sharply, which looks cramped and feels inefficient.
Plan Your Half Circle Driveway Layout and Traffic Flow
The magic of a half circle driveway layout is that it lets visitors pull in, park or drive through, and exit without reversing. But this only works if you design traffic flow intentionally.
Start by identifying your entry and exit points:
- Entry: Where vehicles naturally approach from the street. This is usually the closest point to your property line and road.
- Exit: On the opposite side of the circle, allowing a clean departure without crossing incoming traffic.
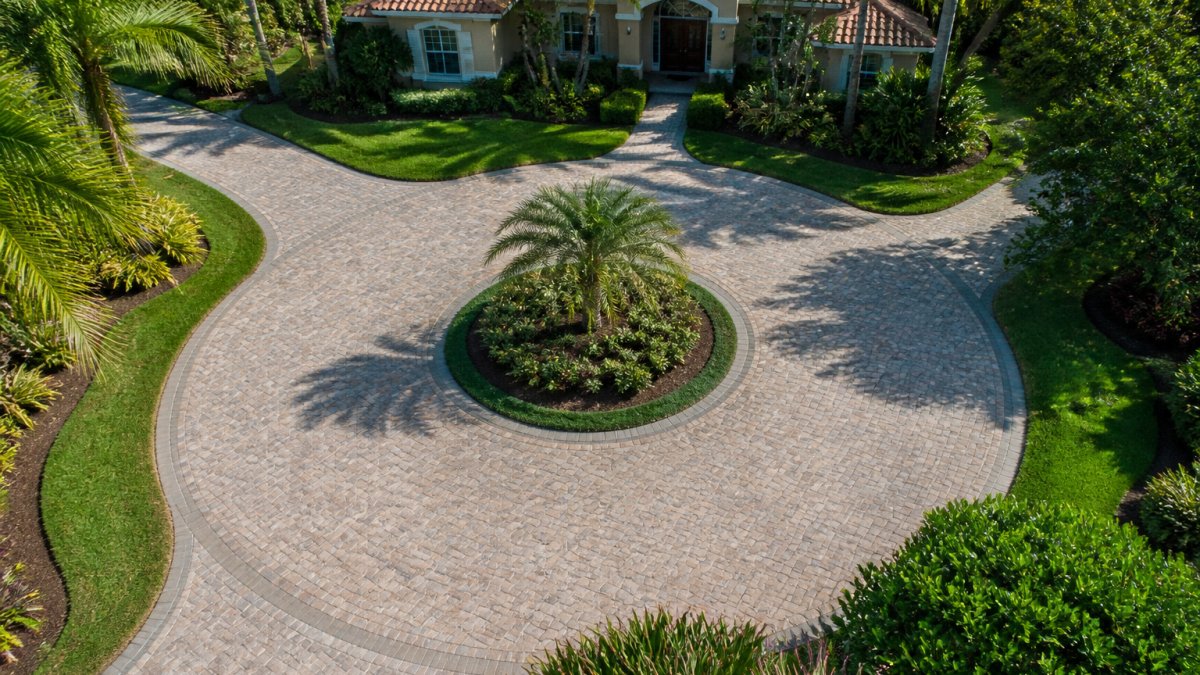
- Central island: The landscaped area in the middle. This anchors the design and creates visual interest.
Draw arrows on your sketch showing how a vehicle enters, curves around the island, and exits. The path should feel natural, not tight or forced.
Consider these traffic patterns:
- Through-traffic: Visitors who don’t park, they pull in and loop back out. This is your default assumption.
- Parked visitor: Someone who stops in front of your house. Make sure there’s room without blocking the circulation path.
- Delivery access: Can a truck navigate your loop without backing? If not, designate a pull-through area or side approach.
The central island doesn’t have to be circular. A curved, organic shape often looks better and gives you design flexibility. Whatever shape you choose, keep it at least 8-10 feet from the inner edge of your driveway to prevent vehicles from clipping it. Ensuring this clearance also helps protect your driveway from the heavy equipment and debris that often accompany landscaping or renovation projects.
Design Circular Driveway Drainage for Long-Term Performance
This is the section most homeowners ignore, and it’s why driveways fail. Circular driveway drainage determines whether your pavers last 10 years or 30.
Water must move away from your driveway, not pool on it or underneath it. Poor drainage causes pavers to shift, settle unevenly, and crack.
Design your drainage in two layers:
Surface drainage: Water running across the top.
- Slope your driveway away from your house at a 1-2% grade (roughly 1 inch of drop per 8 feet of distance).
- For a circular layout, slope from the center outward toward the perimeter.
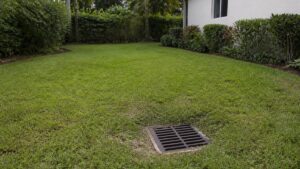
- Add a shallow swale or drainage channel at the outer edge to direct runoff toward a storm drain or natural low point on your property.
Subsurface drainage: Water underneath the pavers.
- Install a perforated drain pipe beneath your base layer, running along the low points of your site.
- This pipe collects water that percolates through the pavers and base, preventing it from pooling below the surface.
- Connect the drain to a dry well, rain garden, or storm drain system.
The base layer itself acts as a drainage buffer. A properly compacted 3~6 inches of stone base allows water to flow laterally and downward, preventing puddles on the surface.
Countless driveways fail because the base wasn’t sloped or the subsurface drain wasn’t installed. The pavers look fine for a year, then the shifting starts.
Create a Sloped Driveway Layout That Works With Your Terrain
Your property’s natural slope is either your best friend or your biggest challenge. A sloped driveway layout that works with the terrain costs less and performs better than fighting against it.
If your property slopes toward the street, you’re in luck. Design your circular driveway to slope naturally downward as it curves, directing water toward the street and away from your house.
For steep slopes, consider these strategies:
- Stepped or terraced design: Break the slope into two or three levels with low retaining walls. This reduces the grade on any single section and improves safety.
- Offset the entry/exit points: Place the entry at a higher elevation and the exit lower, using the natural slope to guide drainage.
- Widen the driveway on slopes: A wider surface distributes weight better and looks more intentional on steep terrain.
Calculate your site’s slope by measuring the vertical drop across the horizontal distance. A 10% slope (1 foot of rise per 10 feet of horizontal distance) is steep for a driveway.
Free consultation & estimate →
Never ignore slope. A flat design on sloped land will fail. Water will pool, pavers will shift, and you’ll regret not working with the terrain.
Choose Materials and Design Elements for Curb Appeal
Your circular driveway material choice affects both durability and how your home looks from the street. This is where function meets first impressions.
Common paver materials include:
- Concrete pavers: Durable, affordable, and available in many colors and textures. They hold up well in the Florida sun and are easy to repair (replace individual pavers if needed).
- Permeable pavers: Allow water to drain through, reducing runoff. Slightly higher cost but better for drainage-heavy sites.
- Asphalt: Least expensive upfront, but requires regular sealing and resealing every 3-5 years. Cracks and potholes develop faster.
- Gravel: Budget-friendly and easy to install, but requires raking and regrading annually. Not ideal for high-traffic areas.
For curb appeal, edge your driveway with a contrasting material or color. A darker border around lighter pavers, or vice versa, defines the space and makes it look intentional. Cobblestone or decorative unit pavers work well for edging.
The central island is your design statement. Plant it with low-maintenance shrubs, ornamental grasses, or a small tree. Avoid tall plants that block sightlines. A ground cover or mulch bed keeps maintenance low.
Consider lighting if your driveway is visible at night. Low-voltage LED lights along the edge or uplighting on the island adds safety and visual interest without being garish.
Common Design Mistakes to Avoid
Even good intentions lead to poor designs. Here are the pitfalls we see most often:
Making the circle too small. A 30-foot diameter feels cramped and forces awkward maneuvers. Visitors will back up anyway. Go bigger, 40+ feet minimum.
Ignoring drainage during design. You can’t add drainage after the fact without tearing up pavers. Slope and subsurface drains must be part of your plan from the start.
Placing the entry and exit too close. This creates traffic conflicts. Space them at least 120 degrees apart around the circle.
Overplanting the central island. Tall shrubs and trees block sightlines and make the space feel claustrophobic. Keep it low and open.
Choosing the wrong base material. Skimping on base prep is the #1 reason driveways fail. A proper 3~6 inch compacted stone base is non-negotiable.
Not accounting for utilities. Hitting a water line or gas line during excavation is expensive and dangerous. Call before you dig.
Designing without considering maintenance. A beautiful design that requires constant upkeep becomes a burden. Choose materials and landscaping you’re willing to maintain.
Next Steps: From Design to Installation
You’ve got a solid design. Now it’s time to move from paper to reality.
First, finalize your design with accurate measurements and a clear overhead drawing. Mark entry and exit points, slope directions, drainage routes, and material transitions.
Next, handle permits and utility locates. Contact your local building department to understand setback requirements (how far your driveway must be from the property line) and any design restrictions.
Then, prepare your site. Excavate to the proper depth, compact the subgrade, and install drainage infrastructure.
Finally, install your pavers, edge materials, and landscaping. Our team has over 30 years of hardscape experience and obsesses over base preparation and drainage planning.
Ready to move forward? Reach out for a free consultation and estimate. We’ll review your design, assess your site, and give you a clear picture of what’s involved.
A well-designed circular driveway solves a real problem: it lets visitors arrive and depart without the awkwardness of backing up. Our certified team will work with you to create a durable, beautiful driveway that functions perfectly and enhances your property’s curb appeal for years to come. Get started with a free consultation and let’s build the driveway you’ve been imagining.
Frequently Asked Questions
What are the recommended measurements for a circular driveway?
A functional circular driveway typically requires a minimum outer diameter of 40 feet for single-lane traffic, though 50-60 feet allows for comfortable two-way flow and visitor parking. The inner island or central area should be at least 20 feet in diameter for planting or landscaping. For a half-circle layout, plan for at least 25-30 feet of depth from the house or road entrance. These dimensions ensure vehicles can enter, turn, and exit without backing up, which is critical for delivery trucks and emergency access.
How do you design a circular driveway on a slope?
On sloped terrain, design your sloped driveway layout with a maximum grade of 12-15% to prevent water runoff and vehicle traction issues. Break the slope into sections if the grade exceeds this threshold, using transition zones between each section. Crown the center of the driveway (slightly higher in the middle) to shed water toward the edges. Work with a professional surveyor to map elevation changes and calculate grading requirements before finalizing your design.
How do you plan drainage for a circular driveway?
Proper circular driveway drainage prevents pooling and pavement failure. Grade the surface to slope away from the house and toward perimeter drain channels. Install subsurface drainage if your site has poor natural drainage or clay soil. Consider permeable paver options that allow water infiltration. Direct runoff toward a catch basin or rain garden rather than toward the house foundation. In areas with heavy rainfall, stormwater management calculations help determine whether additional drainage infrastructure is needed.
Is a circular driveway a good idea for a smaller property?
A circular driveway works well on smaller properties if you opt for a half-circle or teardrop layout instead of a full circle. A half-circle design requires less space and still provides the turnaround benefit without backing out. Measure your available frontage carefully—you need at least 25-30 feet of depth. If space is very limited, a simple curved driveway with a small turnaround area can achieve the same practical benefits with less land commitment.