
Table of Contents
- Why Paver Driveway Lighting Matters
- Choosing the Right Fixtures for Your Paver Driveway
- Understanding Low-Voltage Driveway Lighting
- Solar Paver Lights as an Alternative Option
- Paver Lights Installation: Step-by-Step Process
- Driveway Path Lights Placement and Spacing
- Common Installation Mistakes to Avoid
- Maintenance and Long-Term Performance
- Frequently Asked Questions
Last Updated: October 11, 2026
Why Paver Driveway Lighting Matters
Learning how to add lighting to paver driveways transforms your outdoor space in ways that go beyond aesthetics. At Venice Pavers, we’ve seen firsthand how the right lighting setup solves real problems: safety at night, enhanced curb appeal, and the ability to enjoy your driveway and surrounding landscape long after sunset.
Most homeowners don’t think about driveway lighting until they’ve nearly tripped on an unlit edge. The good news: adding lighting to paver driveways doesn’t require tearing up your existing installation. Whether retrofitting or planning lights during new installation, the process is straightforward when you understand your options.
Proper lighting also protects your investment by showcasing paver texture and color, guiding visitors safely, and deterring unwanted activity.
The most common mistake is installing lights without a plan. Randomly placed fixtures create shadows, glare, and dark spots. A simple layout sketch, even on paper, prevents costly mistakes.
Choosing the Right Fixtures for Your Paver Driveway
Path lights and bollard lights for guiding edges
Path lights (12-24 inches tall) and bollard lights mark driveway edges at ground level, guiding foot traffic naturally.
They shine downward without harsh glare, work best spaced 4-6 feet apart, and come in solar or low-voltage electric versions.
In-ground and embedded lights for subtle illumination
In-ground lights sit flush with the surface; embedded lights are built into pavers during manufacturing. Both create a seamless look.
Embedded lights offer cleaner appearance; in-ground lights retrofit more easily. Both require careful placement to avoid trip hazards and ensure proper drainage.
Accent and uplighting for landscape definition
Uplighting highlights trees, shrubs, or architectural features, adding depth and visual interest to your outdoor space.
Uplighting paired with ground-level path lights creates layered, professional illumination.
| Fixture Type | Best For | Height | Spacing |
|---|---|---|---|
| Path lights | Marking edges, guiding traffic | 12-24 inches | 4-6 feet apart |
| Bollard lights | Durable edge marking | 18-36 inches | 4-6 feet apart |
| In-ground lights | Subtle, retrofittable | Flush to surface | 6-10 feet apart |
| Embedded lights | Seamless paver integration | Flush to surface | 6-10 feet apart |
| Uplighting | Landscape accent | Varies by target | As needed |
Understanding Low-Voltage Driveway Lighting
Low-voltage systems run on 12 volts instead of 120-volt household current, offering safety and ease of installation for adding lighting to paver driveways.
Transformer sizing and electrical safety
A transformer converts household voltage to low voltage. Its wattage must match your total fixture wattage. Undersizing causes dim lights; oversizing wastes energy but doesn’t harm the system.
Calculate total wattage: path lights (4-7W), in-ground lights (3-5W), uplights (5-20W). Add 20 percent for safety margin.
Place the transformer in a weatherproof enclosure near an outdoor outlet. Most include timers for automatic on/off control.
Never run low-voltage wiring without protection under pavers. Unprotected wires can be damaged by foot traffic, freeze-thaw cycles, or shifting pavers. Always use conduit or protective sleeves.
Wire routing and cable protection under pavers
Running wire under pavers requires protection from damage and moisture. Use PVC conduit or flexible cable sleeves.
Before laying pavers, plan wire routes and mark fixture locations. Use conduit along the perimeter and under foot-traffic areas. Manufacturers provide guidance for embedded light wiring.
For retrofitting, run wires along the surface (simpler) or lift pavers for subsurface trenches (cleaner but more work).
Solar Paver Lights as an Alternative Option
Solar lights need no wiring, no transformer, and no electrical connection. Each light has a built-in solar panel and rechargeable battery. This simplicity makes solar an attractive option for homeowners hesitant about electrical work.
Solar path lights and bollard lights work well for marking driveway edges. They charge during the day and illuminate at night automatically. Quality solar fixtures provide 6-12 hours of light on a full charge.
The trade-off is brightness. Solar lights produce less light output than low-voltage electric lights. They also depend on sunlight exposure, shaded areas may not charge fully. In climates with frequent overcast days, solar lights may underperform.
Solar embedded lights are less common but available. They work best in open, unshaded locations. Battery life typically lasts 3-5 years before replacement becomes necessary.
For most driveway applications, solar works best as a supplemental option rather than your primary lighting system. Pair solar path lights with a few low-voltage in-ground lights for reliable, layered illumination. Integrating these fixtures requires careful attention to wiring and moisture protection, so mastering the fundamentals of installing garden path lighting ensures your driveway remains both functional and hazard-free.
Paver Lights Installation: Step-by-Step Process
Installing lights in a paver driveway requires careful planning and attention to detail. The process differs depending on whether you’re adding lights to an existing driveway or installing them during new paver laying.
Retrofitting lights into an existing paver driveway
Retrofitting existing driveways is possible but requires more work than installing lights during initial paver laying. Here’s the process:
-
Plan your layout. Mark where each light will go using spray paint or chalk. Step back and visualize the result. Adjust spacing and placement until the layout looks balanced and guides traffic naturally.
-
Prepare the transformer location. Choose a spot near an outdoor outlet, ideally under a covered area or in a weatherproof box. Run power to the transformer before installing any lights.
-
Route your wire. Decide whether to run wire along the surface (hidden under mulch or edging) or beneath the pavers. For surface routing, use wire covers or conduit. For subsurface routing, carefully lift pavers along your planned wire path.
-
Install conduit and wire. Lay PVC conduit along your route. Pull low-voltage wire through the conduit. Leave extra wire at each fixture location, at least 12 inches for connections.
-
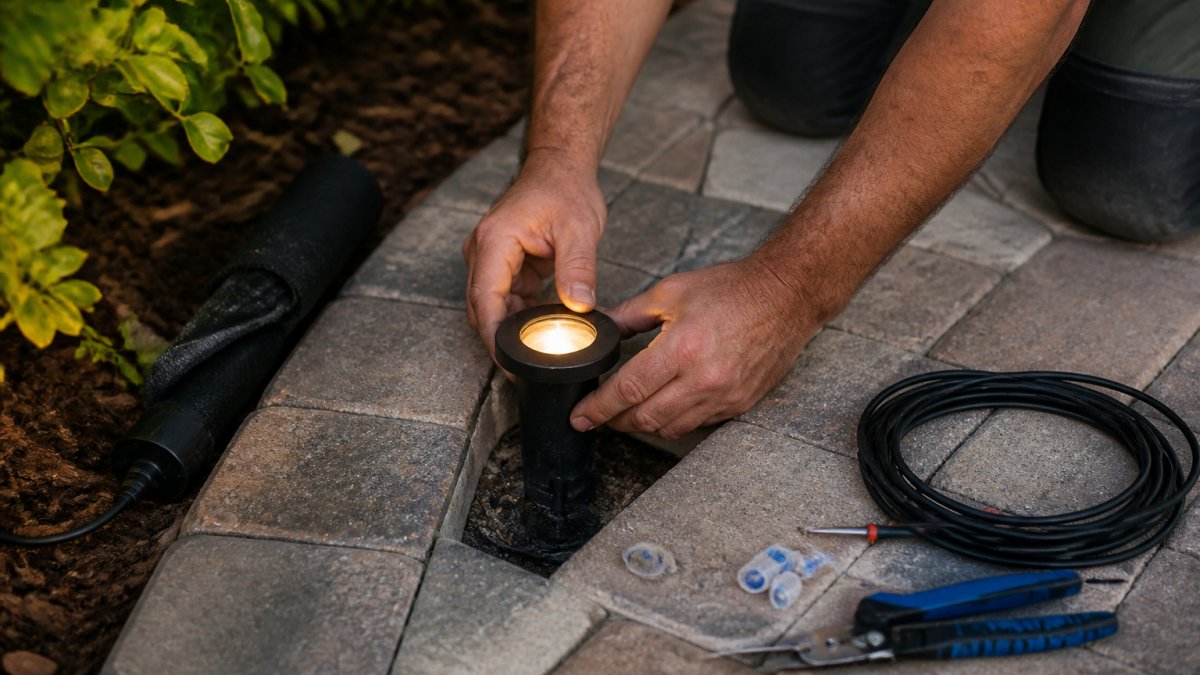
Install fixtures. For in-ground lights, dig a hole slightly larger than the fixture housing. Set the fixture level with the ground. For path lights, simply position them where you want them and secure the stake.
-
Make connections. Connect wires to each fixture according to the manufacturer’s instructions. Use waterproof connectors rated for outdoor use. Bury or hide connections below ground when possible.
-
Test and adjust. Turn on the system and check each light. Adjust angles and brightness settings as needed. Make sure all lights function before replacing pavers or finishing the area.
Installing lights during new paver installation
Installing lights during new paver laying is simpler and cleaner. The process integrates lighting into your design from the start.
-
Design your lighting layout. Work with your paver installer to plan light placement. Embedded lights must be ordered with the pavers. Low-voltage in-ground lights can be installed after paver laying.
-
Prepare the base. As your paver base is being prepared, route conduit for low-voltage wiring. This happens before pavers are laid, making it invisible in the final installation.
-
Lay pavers with embedded lights. If using embedded lights, they’re installed as pavers are laid. The wiring connects as each paver is positioned.
-
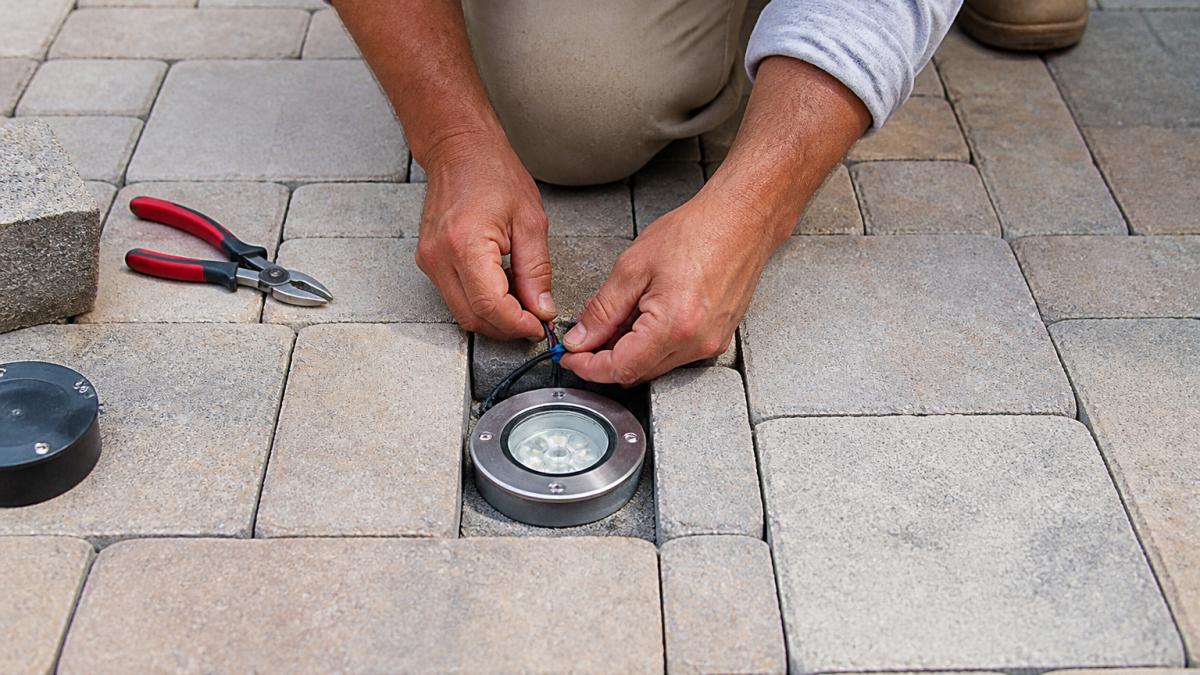
Install in-ground fixtures. After paver laying is complete, mark locations for in-ground lights. Carefully cut openings in pavers or use pre-made cutouts. Install fixtures level with the paver surface.
-
Connect the system. Run low-voltage wire from the transformer to each fixture through protected conduit. Make all connections waterproof.
-
Test before finishing. Verify every light works before sealing joints or completing final landscaping.
Driveway Path Lights Placement and Spacing
Where you place lights determines how well your driveway functions and looks. Good placement guides traffic, highlights the driveway’s best features, and avoids glare and dark spots.
Mark the edges. Place path lights along both sides of your driveway to define its boundaries. Space them 4-6 feet apart. Closer spacing creates more continuous light.
Highlight transitions. Place lights where your driveway meets other surfaces, where it connects to a walkway, where it curves, or where it slopes. These transition points benefit from extra lighting.
Avoid obstacles. Don’t place lights directly in traffic paths or where they’ll be stepped on. Position them just inside the driveway edge, not in the middle of the paved surface.
Consider sight lines. Step back and look at your driveway from the street and from your house. Lights should be visible and guide the eye naturally. Avoid placing lights directly in front of windows where they create glare.
Account for shadows. Trees and structures cast shadows. Adjust light placement to minimize dark spots. Sometimes adding an extra light in a shadowed area solves the problem better than adjusting existing lights.
Common Installation Mistakes to Avoid
Learning from others’ mistakes saves time, money, and frustration.
Undersizing the transformer. Choosing a transformer with too little capacity results in dim lights and system failure. Calculate total wattage carefully and add 20 percent.
Placing lights without a plan. Random light placement creates uneven illumination, dark spots, and glare. Sketch your layout first. Adjust on paper before installing anything.
Running unprotected wire. Wiring exposed to foot traffic, weather, and shifting pavers fails quickly. Always use conduit or protective sleeves. This extra step prevents costly repairs later.
Ignoring drainage. Lights collect water if not installed properly. Ensure drainage holes aren’t blocked. Position fixtures so water runs away from the light housing, not into it.
Mixing incompatible systems. Don’t connect solar lights to a low-voltage transformer or vice versa. Each system is independent. Mixing them causes malfunction.
Installing lights too close together. Lights spaced less than 4 feet apart create overlapping pools of light and waste energy.
Forgetting about maintenance access. Install lights where you can reach them for cleaning and maintenance. Lights covered by mulch or blocked by plants become inaccessible.
Maintenance and Long-Term Performance
Proper maintenance keeps your paver driveway lights working reliably for years. Most maintenance tasks are simple and take minimal time.
Clean fixtures regularly. Dust, pollen, and debris reduce light output. Wipe fixtures clean every few months.
Check connections annually. Inspect wire connections for corrosion or looseness. Tighten any loose connections. Replace corroded connectors immediately.
Test the system seasonally. Turn lights on and walk your driveway. Look for lights that aren’t working or seem dim. Address problems promptly before they worsen.
Replace bulbs as needed. LED bulbs last much longer than older bulb types, but they eventually fail. Keep spare bulbs on hand so you can replace them quickly.
Inspect for water damage. After heavy rain, check lights for water inside the housing. Water damage usually means the fixture needs replacement.
Trim vegetation. Trees and shrubs that grow over lights block illumination. Keep plants trimmed back so lights function as designed.
Check the transformer. Verify the transformer is functioning by checking for a light indicator. Most transformers have a small LED that shows they’re operating.
Adding lighting to paver driveways enhances safety, curb appeal, and your ability to enjoy your outdoor space after dark.
Frequently Asked Questions
Can you add lighting to an existing paver driveway?
Yes, you can retrofit lighting into an existing paver driveway, though it requires careful planning. The process involves lifting sections of pavers, routing low-voltage wire through the base, and installing fixtures that sit flush with the paver surface. This approach works best when you plan the light layout in advance and work with professionals who understand proper wire protection and drainage maintenance to avoid future settling or damage.
How far apart should driveway path lights be placed?
Path lights and bollard lights along paver driveways are typically spaced 4 to 8 feet apart, depending on your desired brightness level and fixture output measured in lumens. Closer spacing creates more uniform illumination and enhanced safety visibility, while wider spacing reduces fixture count and installation costs. Consider your driveway width, traffic patterns, and whether you want accent lighting or functional visibility when determining your final spacing.
What’s the difference between solar paver lights and low-voltage options?
Solar paver lights charge during the day and operate independently without wiring, making them easier to install but typically dimmer and less reliable in cloudy conditions. Low-voltage driveway lighting connects to a transformer and delivers consistent, brighter illumination regardless of weather. Low-voltage systems require trenching and wire installation but provide superior performance, longer operating hours, and better reliability for high-traffic paver driveways.
How do you prevent paver driveway lights from being damaged by vehicle traffic?
Lights must be installed flush or slightly recessed into the paver surface so they don’t protrude above the driveway plane. Use load-rated fixtures designed for vehicle traffic, typically rated for at least 300 pounds per fixture. Install lights along the perimeter and borders rather than in direct tire paths, and ensure proper base preparation so pavers remain stable and level, preventing fixtures from shifting or cracking under wheel load.